Introduce Load Balancing
A load balancer is a device or software that distributes incoming network traffic across multiple servers or resources. Its primary function is to prevent any single server from becoming overwhelmed with requests, thereby improving the overall system’s responsiveness and availability.
Key benefits of load balancing include:
- Efficiency: Load balancers distribute requests across multiple servers, preventing overload and improving response times.
- High availability: By routing traffic only to healthy servers, load balancers ensure continuous service even if some servers fail.
- Scalability: Load balancers allow for easy addition or removal of servers to handle changing traffic demands.
- Flexibility: Servers can be added or removed from the pool for maintenance without affecting overall service.
- Performance optimization: Load balancers can route requests to the most suitable server based on various factors, improving overall system performance.
Overview Configuration on GCP
This setup guide shows you how to set up Regional External Load Balancer with Instance Templates, Instance Group, Health Checker, Certificate Manager, and configure Cloud DNS on Google Cloud platform then register a domain name on Domain.com website.
Before we begin, we should complete the following steps before we create the load balancer.
- Configure Instance Templates.
- Create VM by our Instance Templates, then install apache2 web server and write your index page.
- Configure Instance group and Health Checker.
- Register a domain name and set up the NameServer on advance configuration tab on Domain.com.
- Configure Certificate Manager.
- Configure Load Balancer.
- Configure Cloud DNS.
After that we can set up Load Balancer on Google Cloud Console. Let’s start.
1. Configure Instance Templates
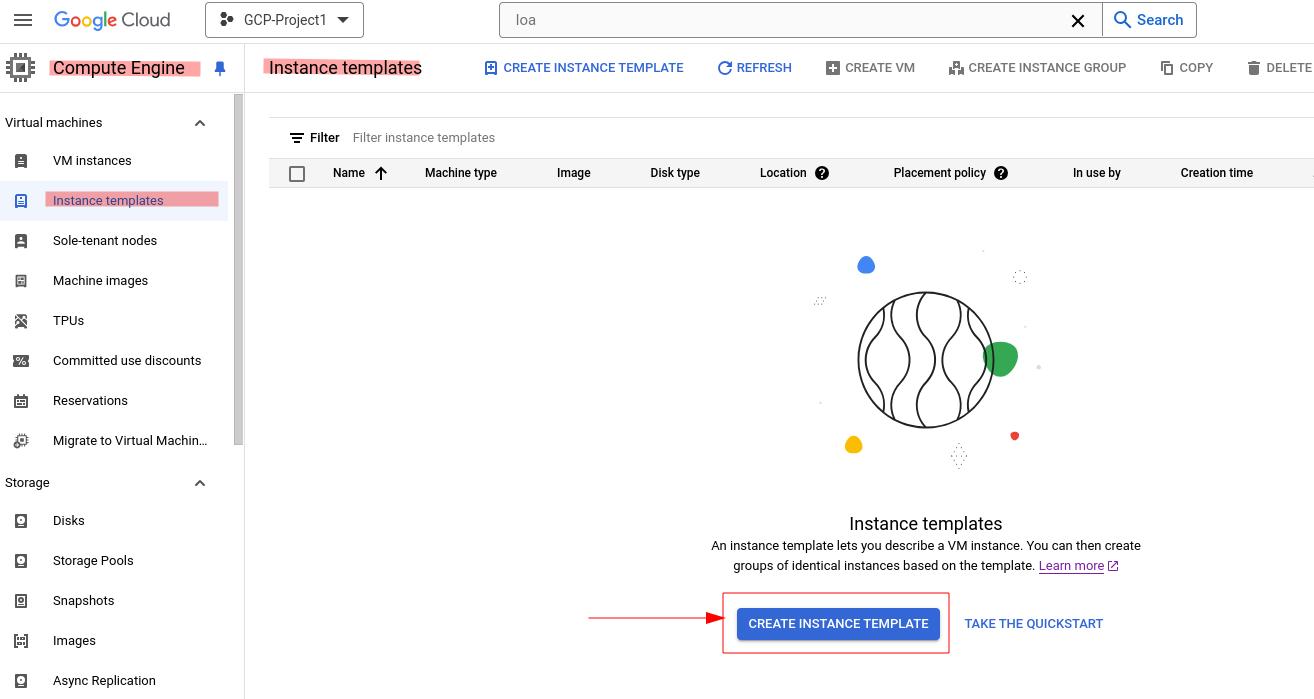
In the Google Cloud Console, go to the Instance templates page, click CREATE INSTANCE TEMPLATE button.
For Name, enter loadbalancing1. And we don’t need to change the location and Machine Configuration, the default settings will be:
- Location:
Regional(recommended) - Machine configuration:
E2

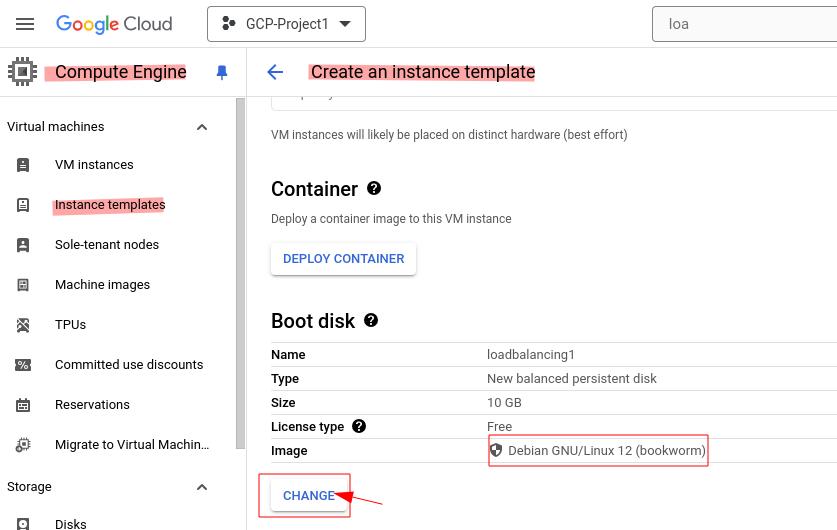
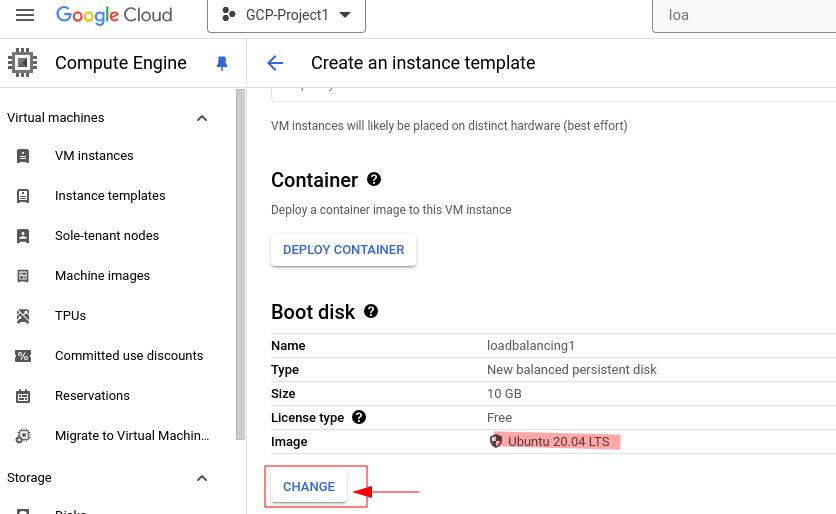
For Boot disk, the default settings is Debian image, we should make some change.
Ensure that the Boot disk is set to a Ubuntu image, such as Ubuntu 20.04 LTS.
These instructions use commands that are available on Ubuntu, such as apt-get. Click CHANGE button.
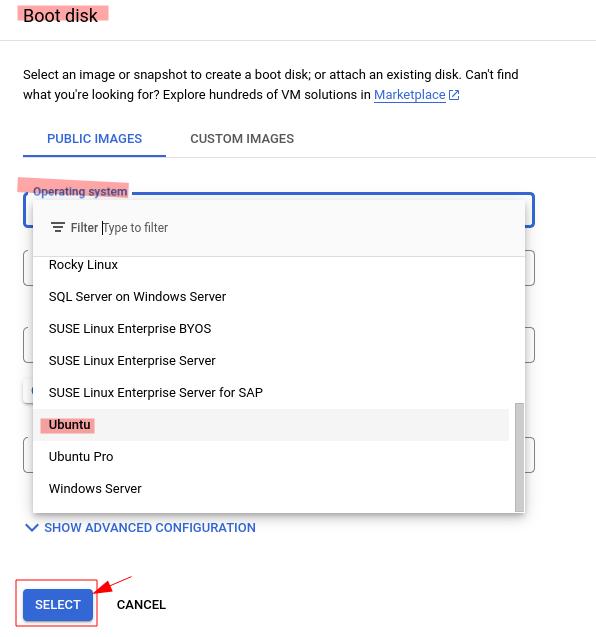
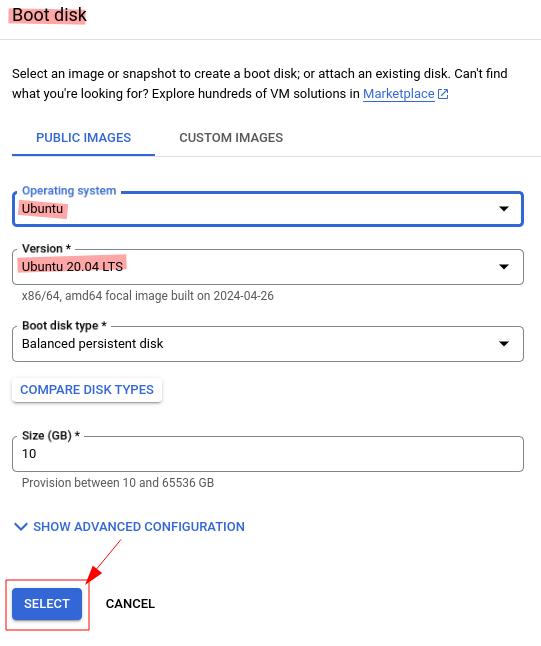
From Operating system to selected Ubuntu option and the Version menu will show Ubuntu 20.04 LTS, then click SELECT button. When you click the select button, you will see this interface.
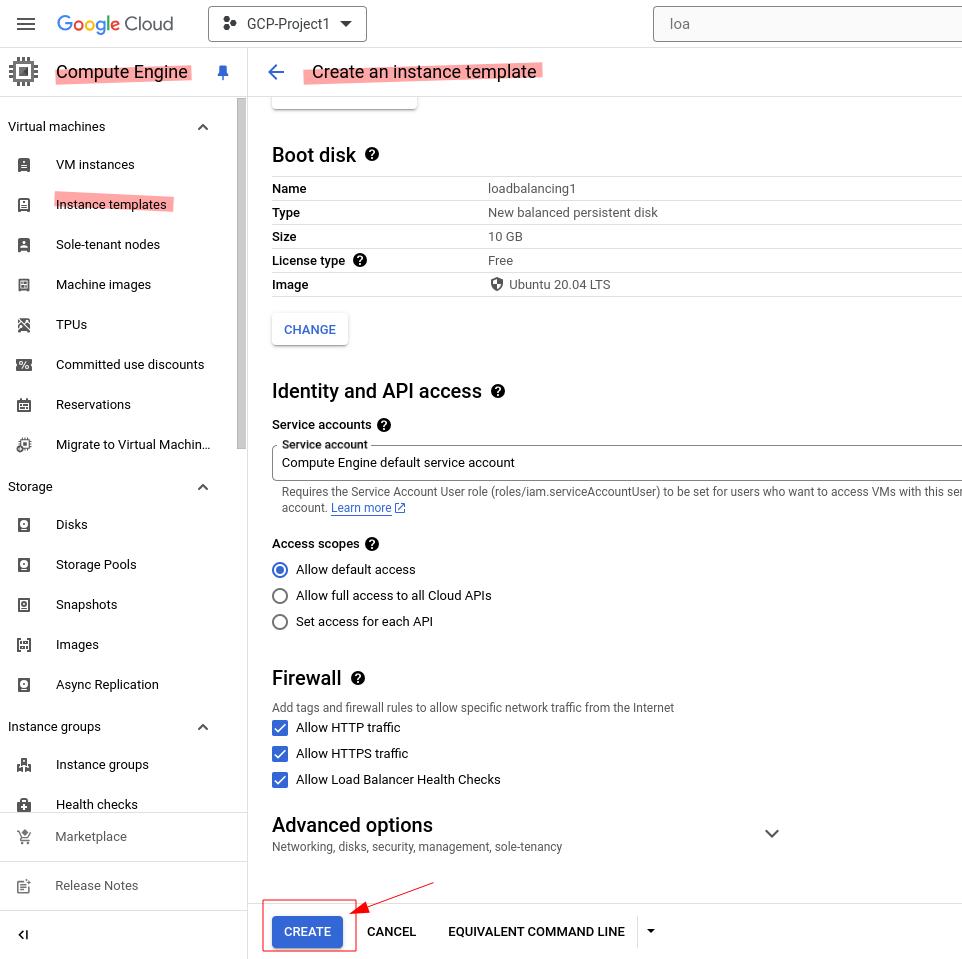
Then we configure the Firewall option. We need to select Allow HTTP traffic, Allow HTTPS traffic and Allow Load Balancer Health Checks under Firewall. Then Click CREATE button.
Then you will see a new record on Instance Templates page. We will continue to do the next steps to Create VM and install apache2 web server, then create your first index page.
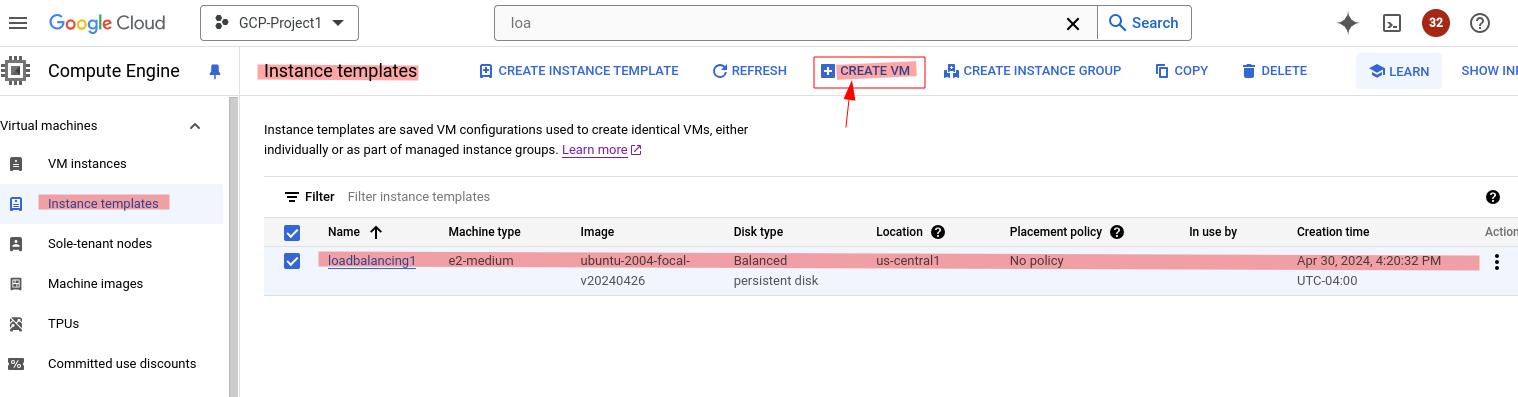
2. Create VM and set up apache2 web server
In Instance Templates page, check the first record which name is loadbalancing1 then click the CREATE VM button.
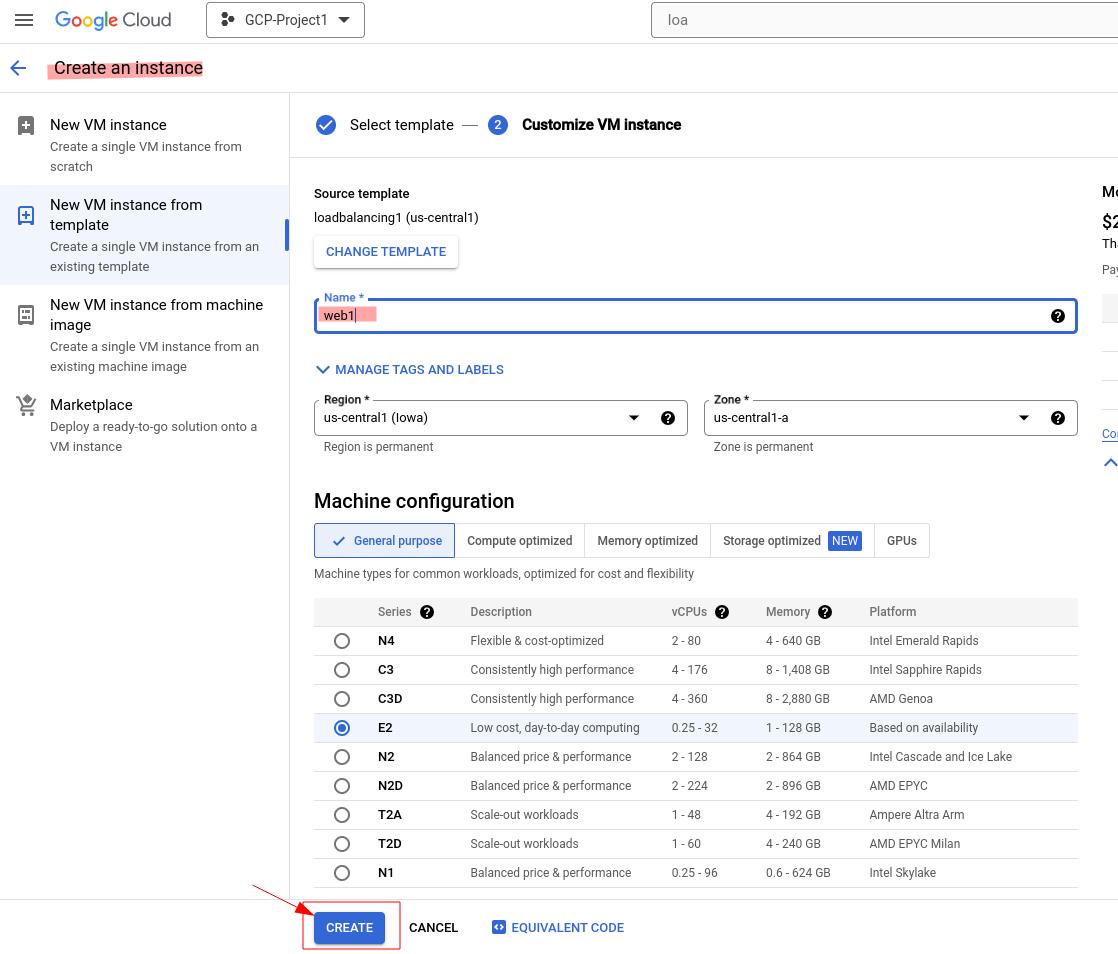
You will see this interface as below, for the Name Textbox, enter web1. According the default settings, all of the settings, we have made configuration on the first step. Then scroll down the page, click CREATE button.
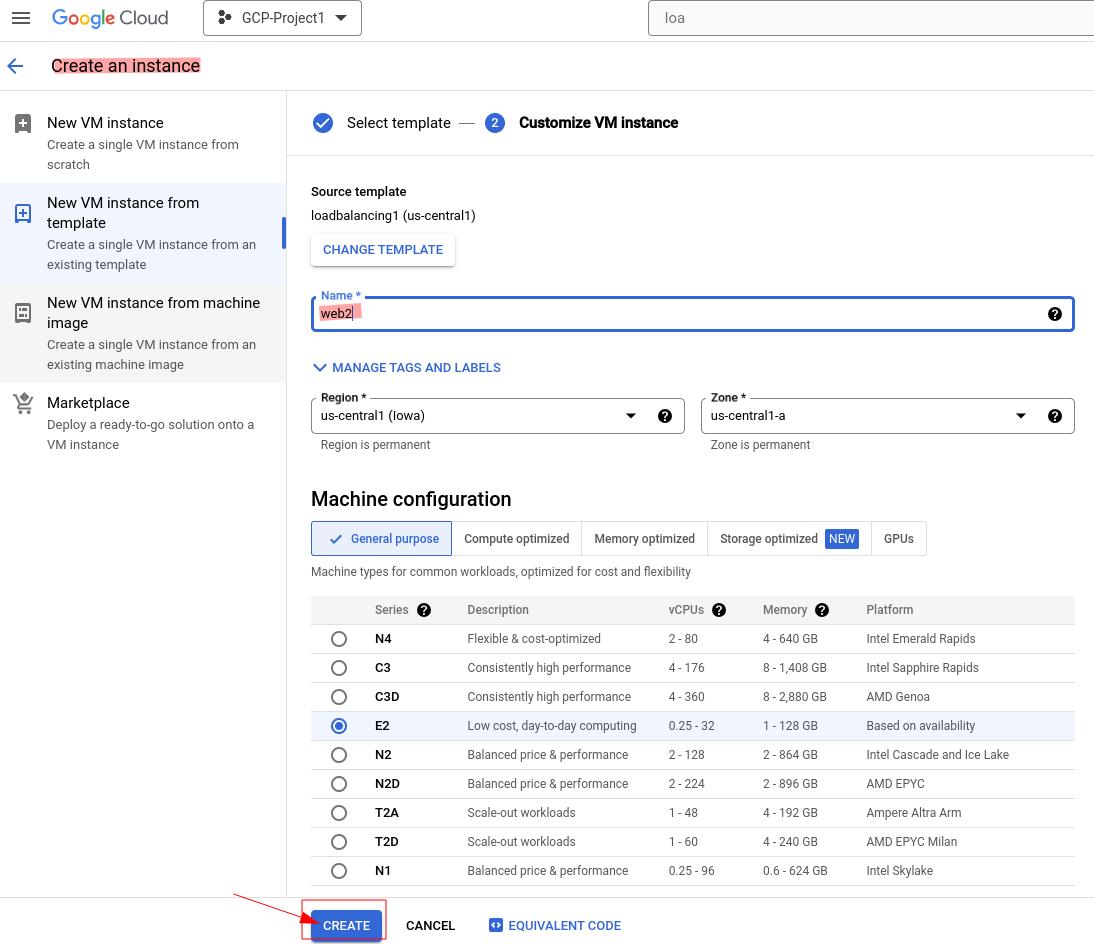
Then we should repeat this step to create another VM, set up the Name as web2 then click CREATE.
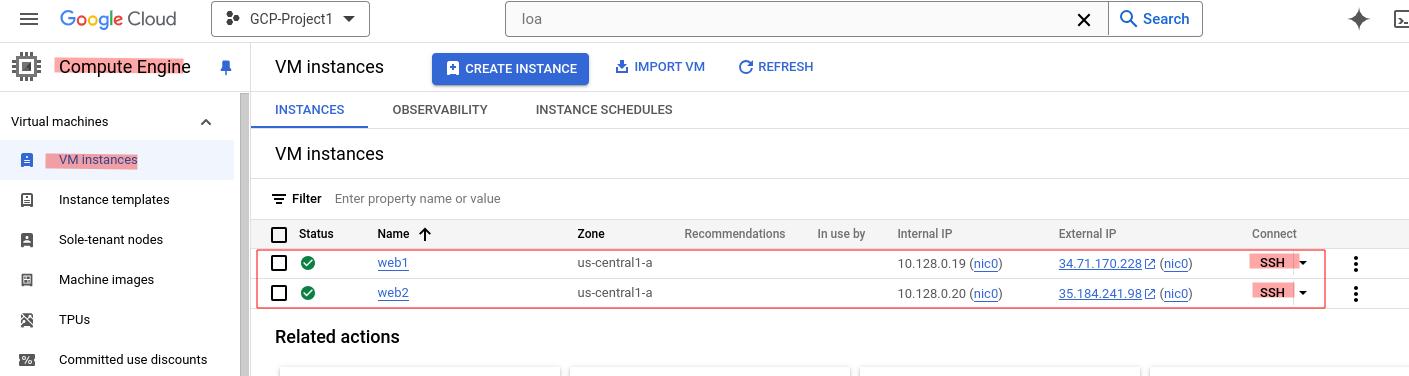
When you finished these steps, you will find there are two VM in the VM instance page on Google Cloud Console.
Then Click the SSH button on the first record, the VM name is web2, we should do the same operating on web1
we should update and upgrade the VM first then install apache2 web server.
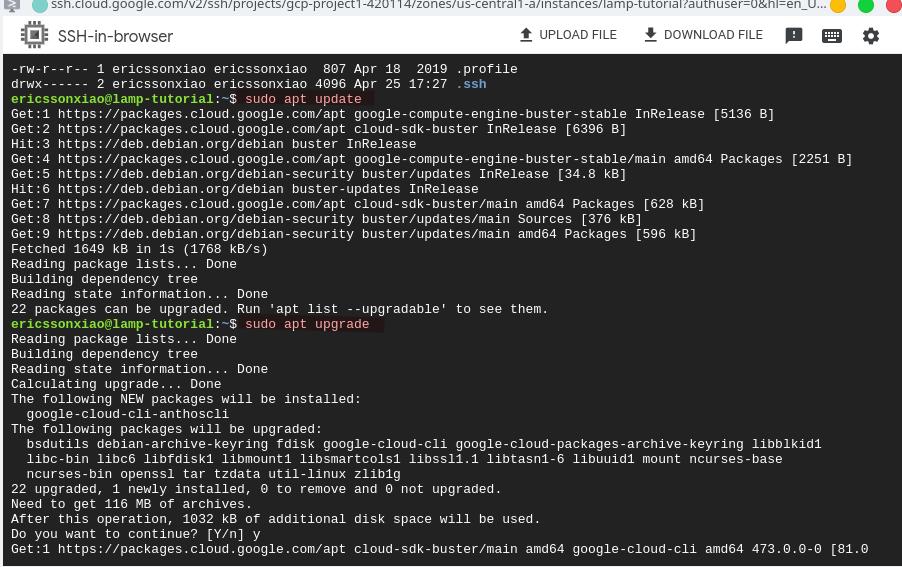
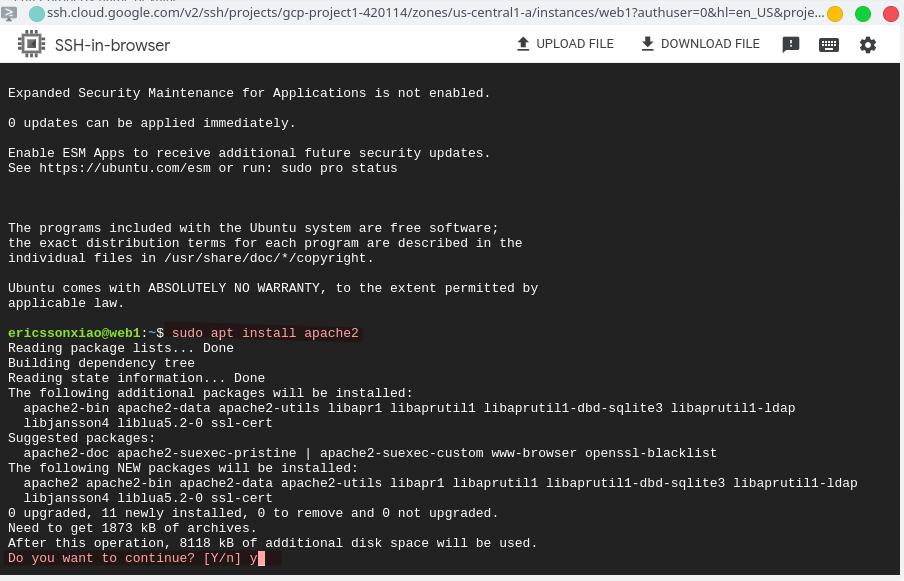
you will see this interface, in order to install apache2 web server, type command sudo apt install apache2 then type y to start install it.
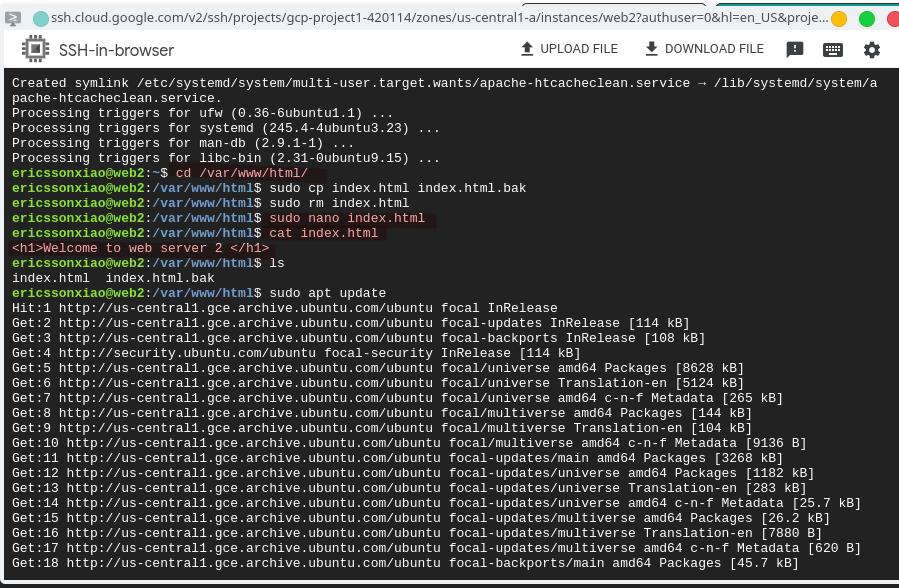
Then go to /var/www/html directory, to set up the index.html page.
3. Configure Instance Group and Health Checker
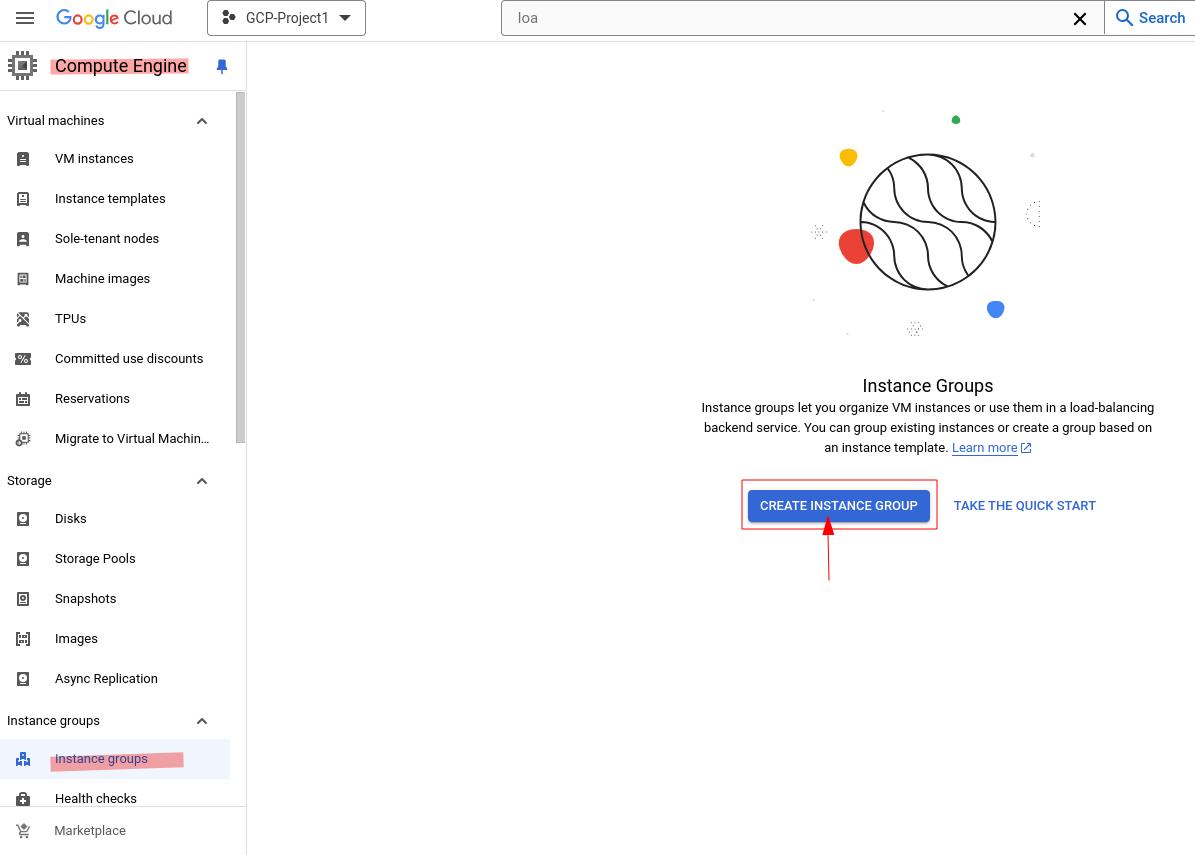
In the Google Cloud Console, go to the Instance Groups page, Click CREATE INSTANCE GROUP button.
On the left, choose New unmanaged instance group.
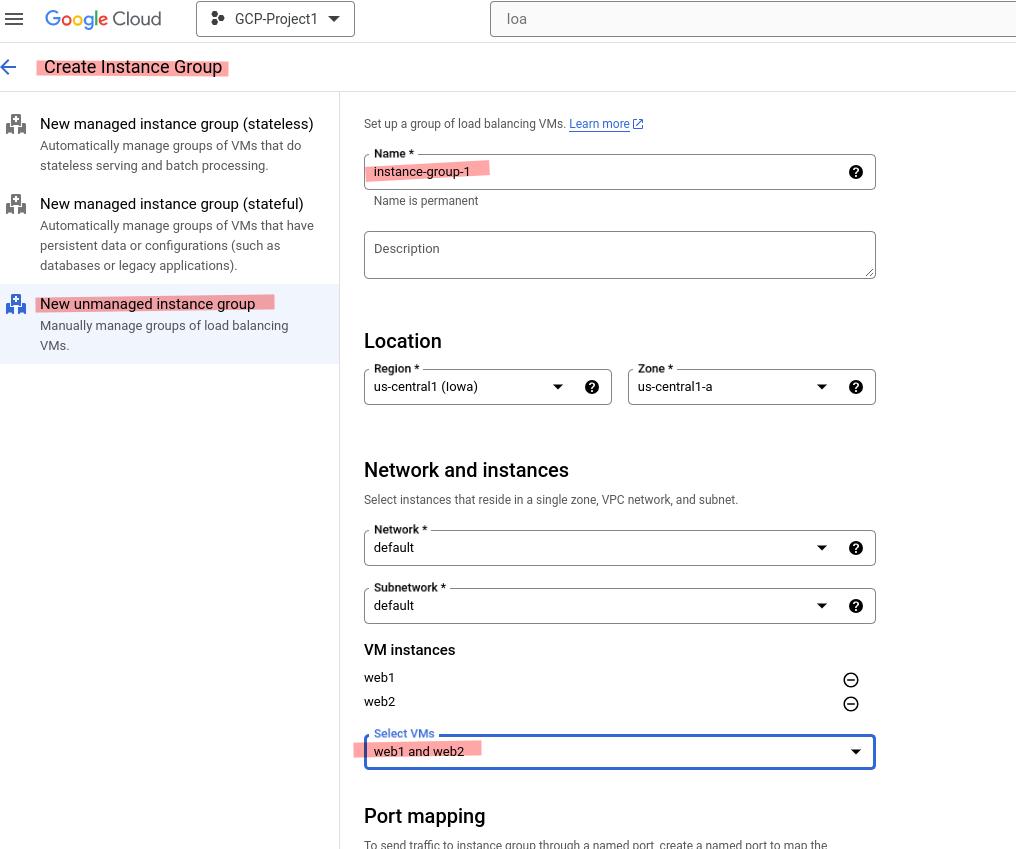
- For Name, enter
instance-group-1. - For Region, select default region. This example uses
us-central1. - For Zone, select
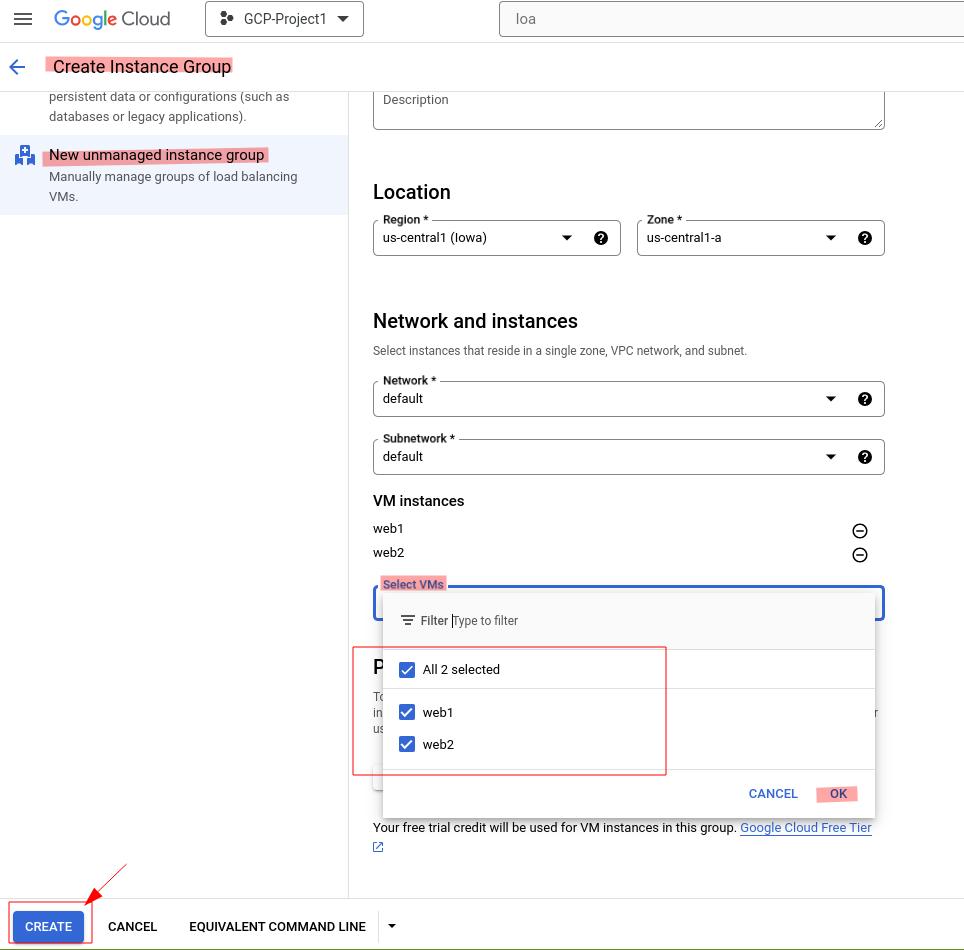
us-central1-a. - Under VM Instances, select Vms, click the drop-down menu to choice
web1andweb2VM.
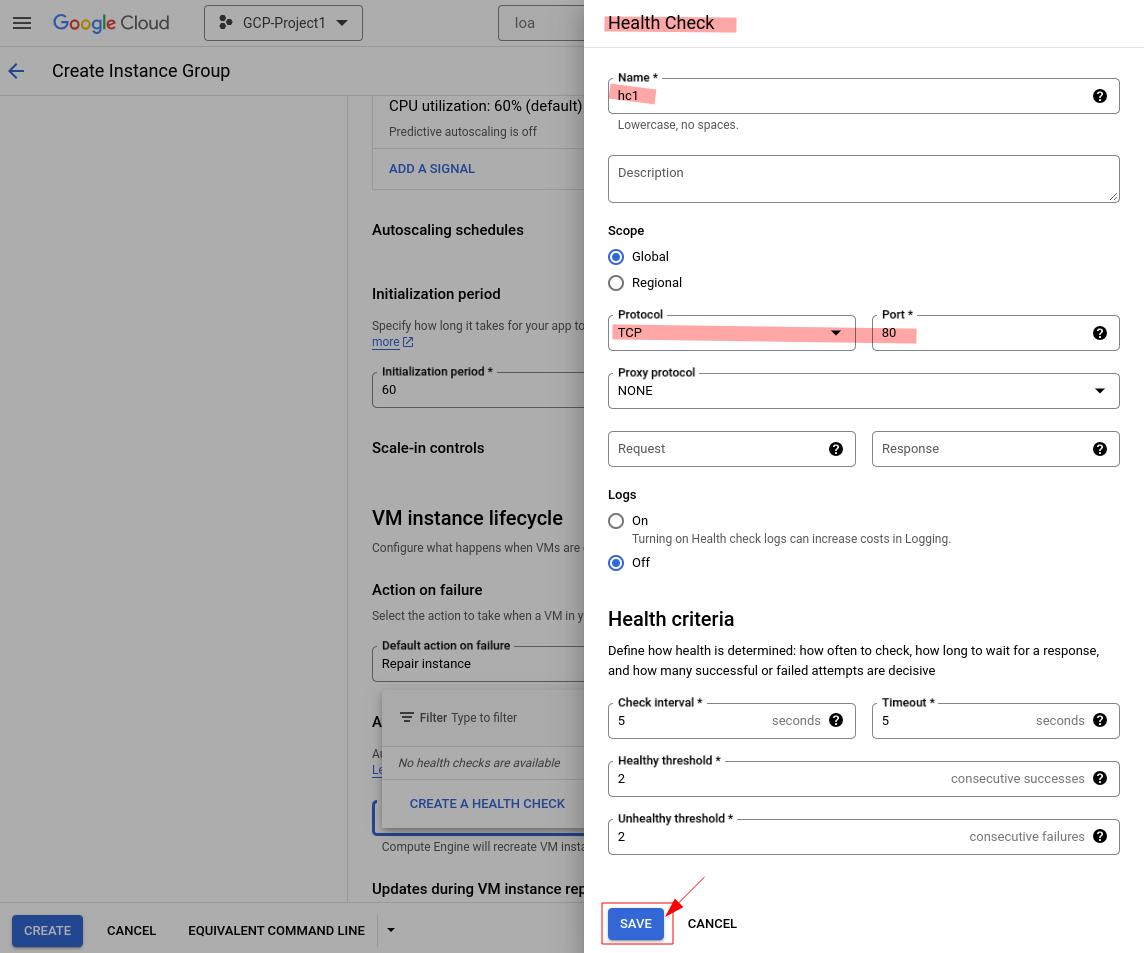
Under VM Instance lifecycle, go to Default action on failure, click the drop-down menu, then click CREATE A HEALTH CHECKER button on this menu. You will see the configuration options for Health Checker on the right of screen. Next, we will config Health Checker.
- For Name, enter
hc1. - For the Protocol and Port options, keep the default settings which is TCP and
80.
Below is the Health Checker configuration interface:
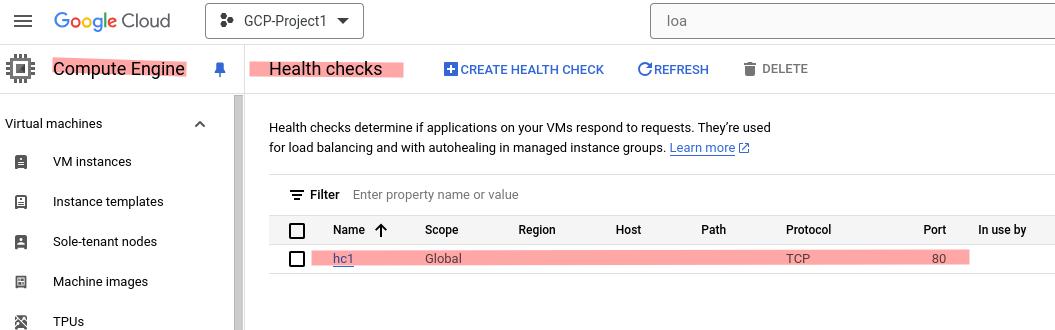
When you config Health Checker successfully, you can go to Health Checks page on the part of Computer Engine. You can see this record in this page.
When you finished all of the configurations, to create the new instance group, click CREATE button.
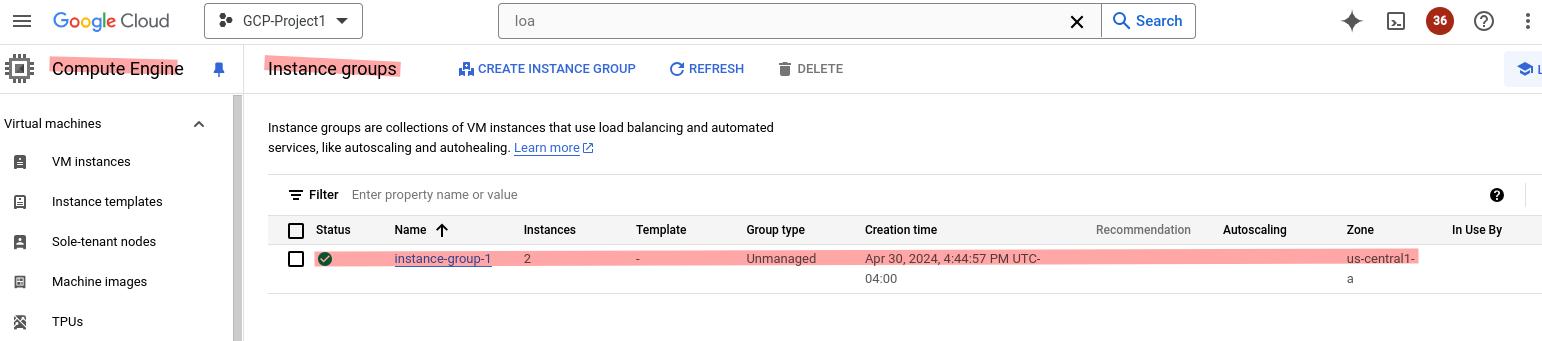
Then you will see the new instance group record in Instance Groups page. The interface looks like this:
4. Register a domain name and configuration the NameServer
You should open domain.com website first, then choosing a good domain name to buy it. Then you can click Login button to manage your profile and NameServer configuration.

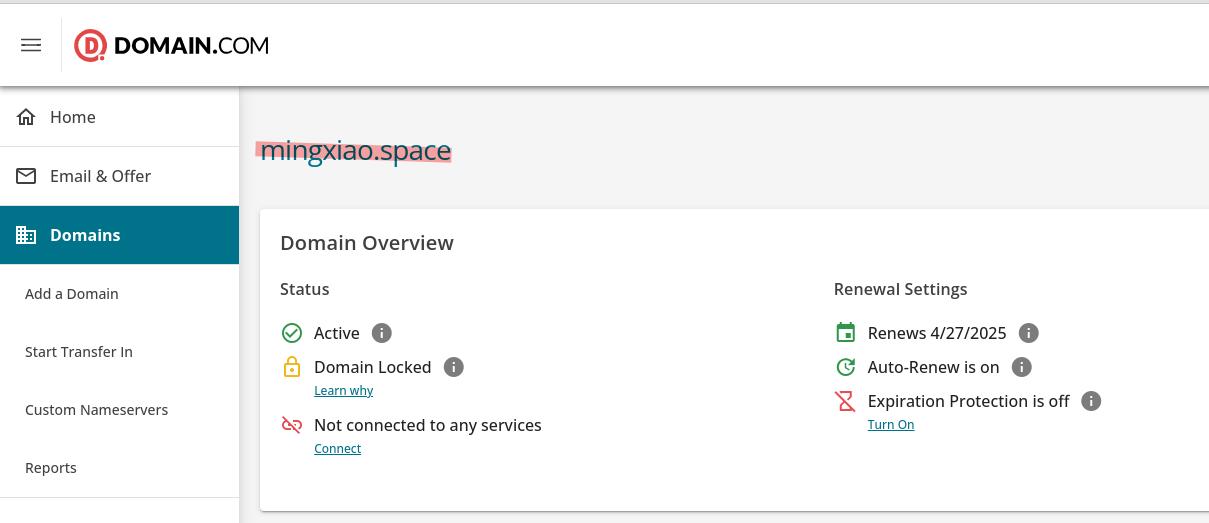
I have buy a domain mingxiao.space. When I login this website, Click Domains button on the left of this website, I can see my domain overview.
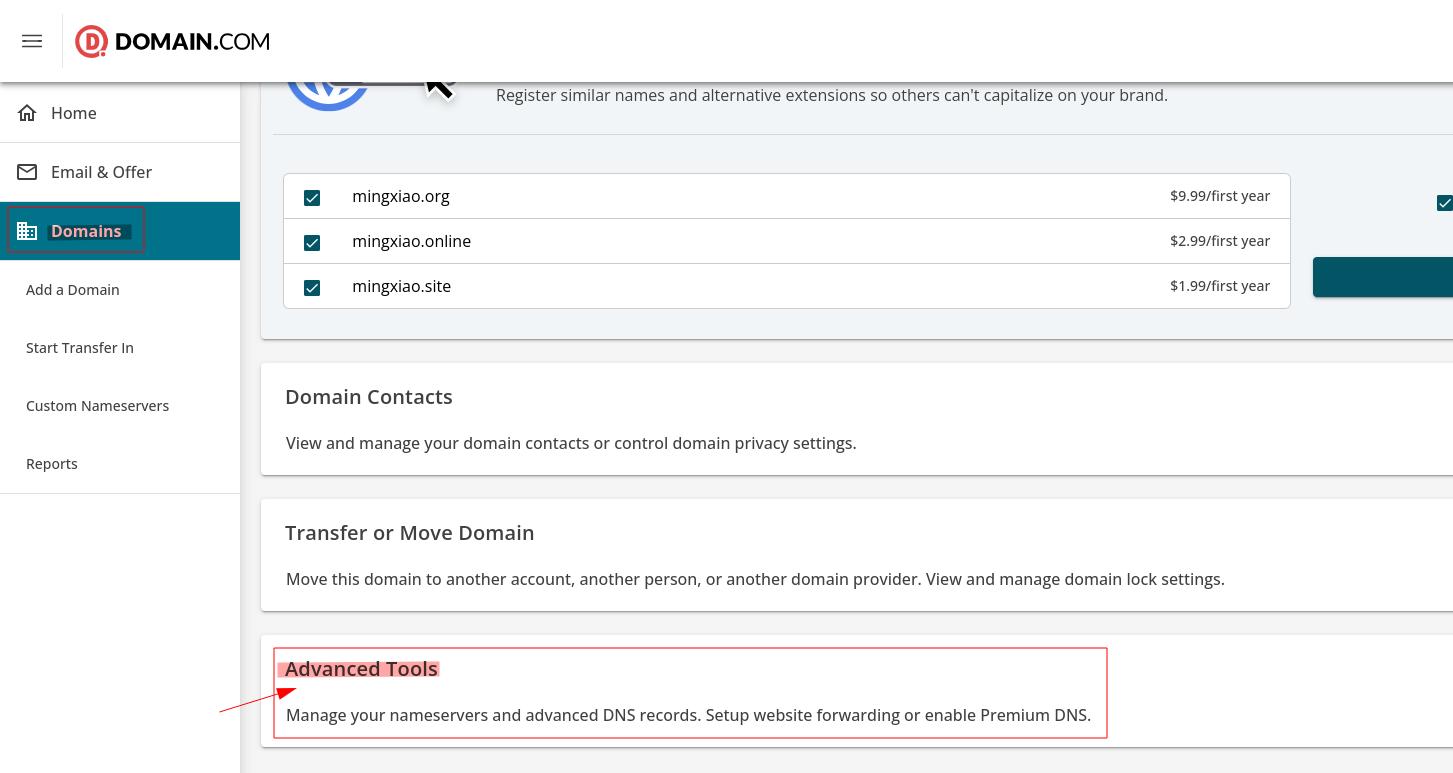
When I scroll down this page, you can find Advanced tools on the bottom. Then click it.
Click Manage button to config google DNS NameServer.
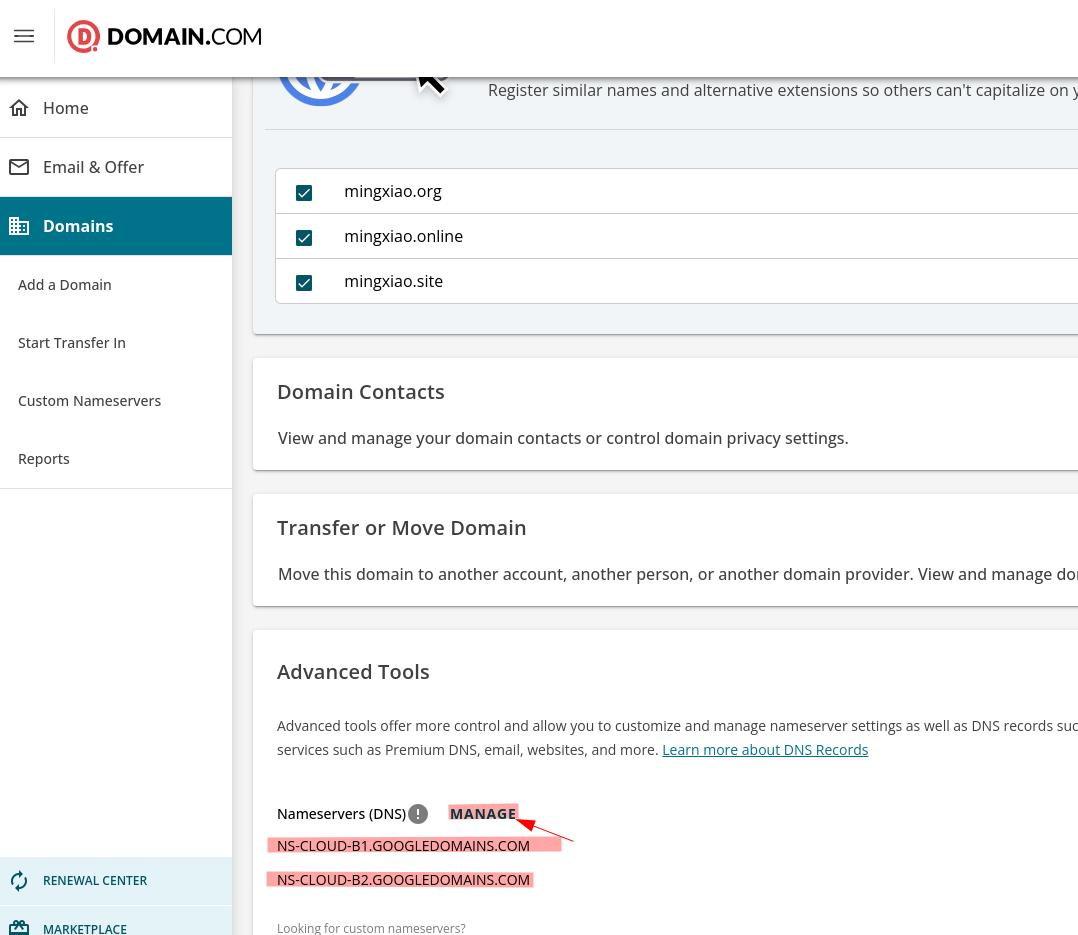
If you don’t have the DNS NameServer, You can go to the step 7, to check Google DNS NameServer address, then type here.
5. Configure Certificate Manager
In the Google Cloud Console, go to the Certificate Manager page. On the page that appears, select the Classic Certificates tab.
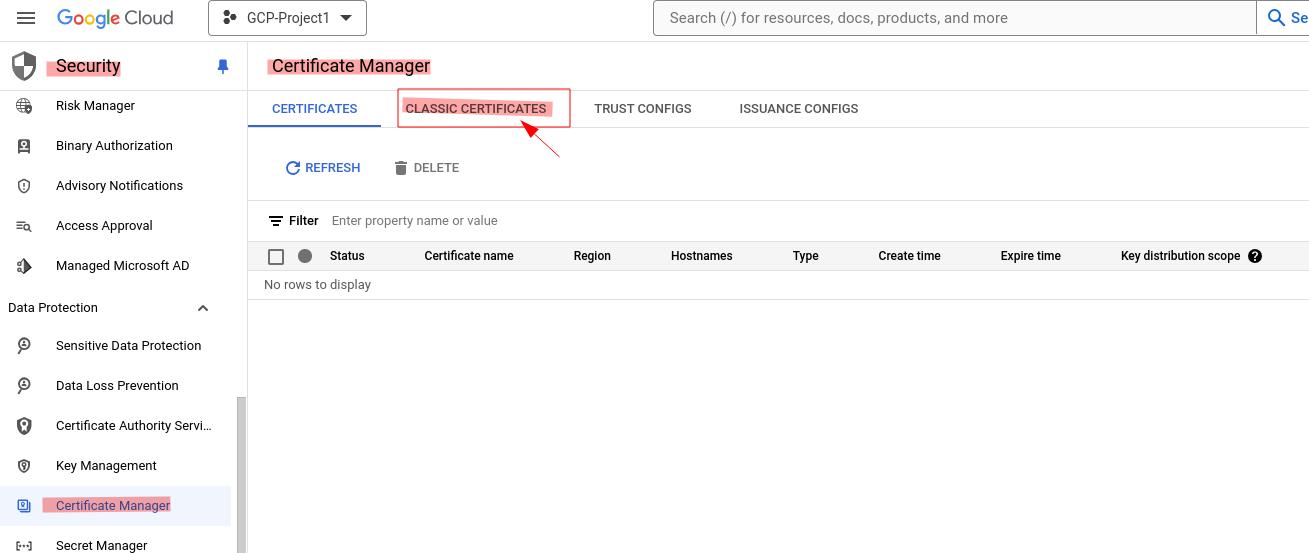
Then you will see the CREATE SSL CERTIFICATE button, click it. Then you will see the configuration interface looks like this:
- For the Name option, enter
mingxiao. - We have already created the
mingxiao.spacedomain name on step 4. right now we can use it. - Under the Domains you can find domain1, type
mingxiao.spaceinto textbox.
Then click CREATE button to create a record.

6. Set up Load Balancer
In the Google Cloud Console, go to the Load balancing page. Click Create load balancer button.
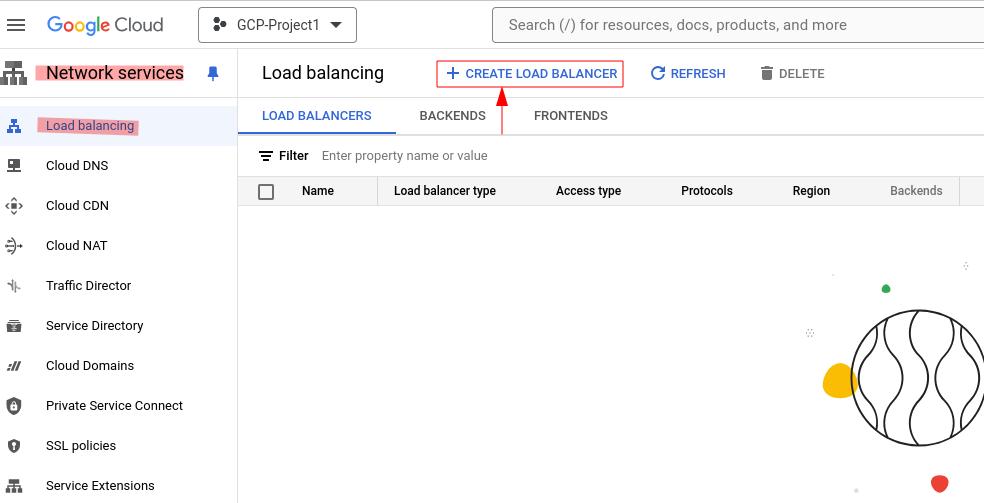
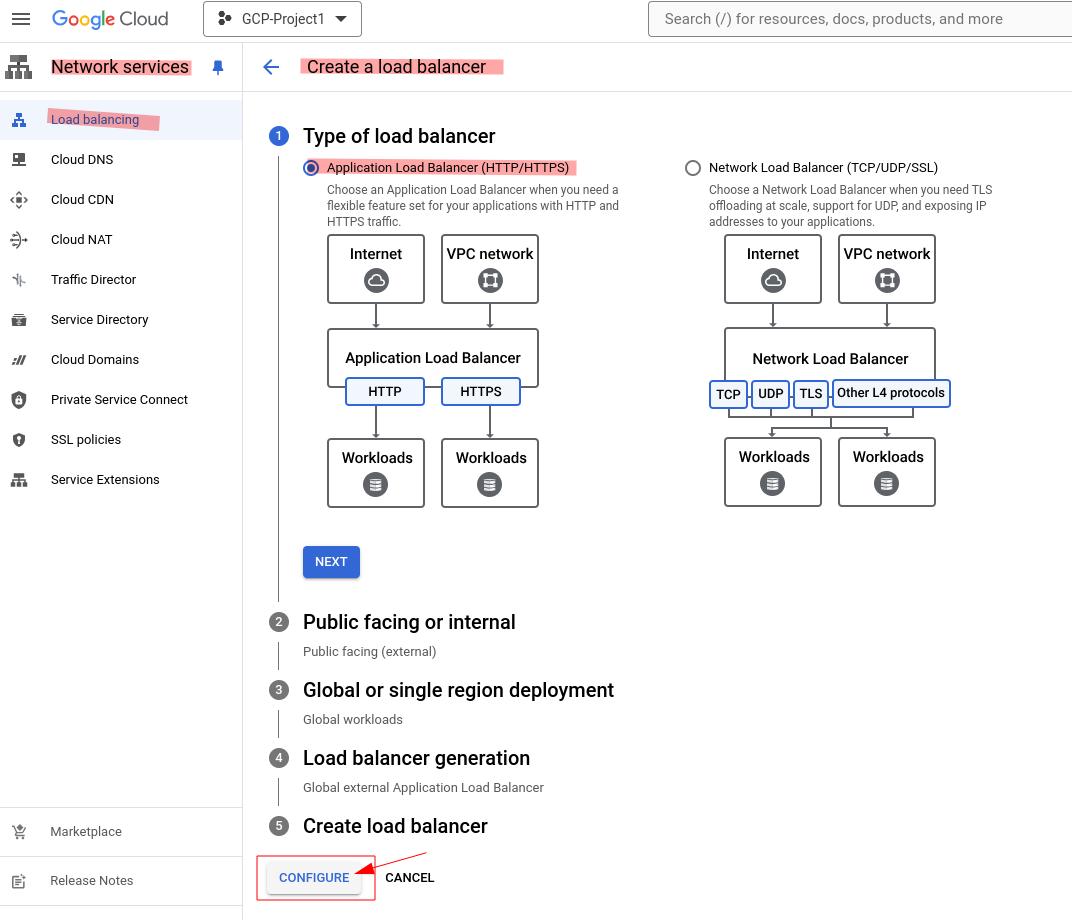
For Type of load balancer, select Application Load Balancer (HTTP/HTTPS) and click CONFIGURE button.
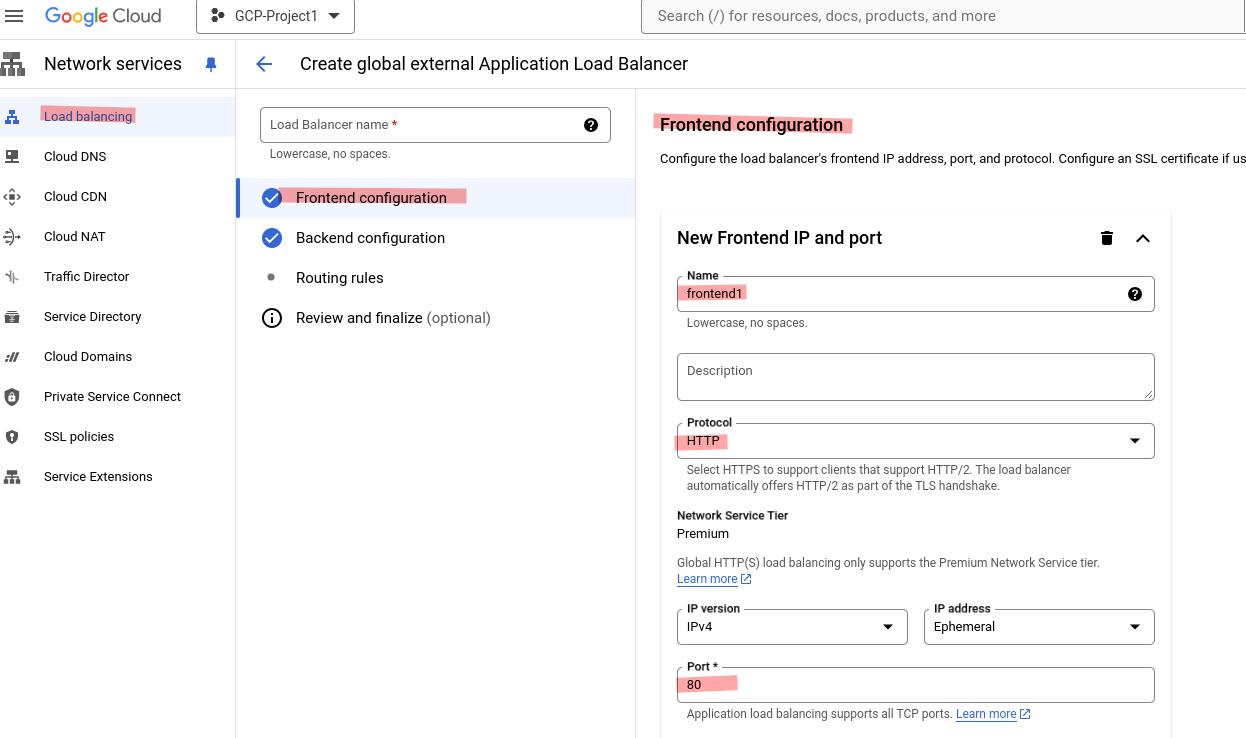
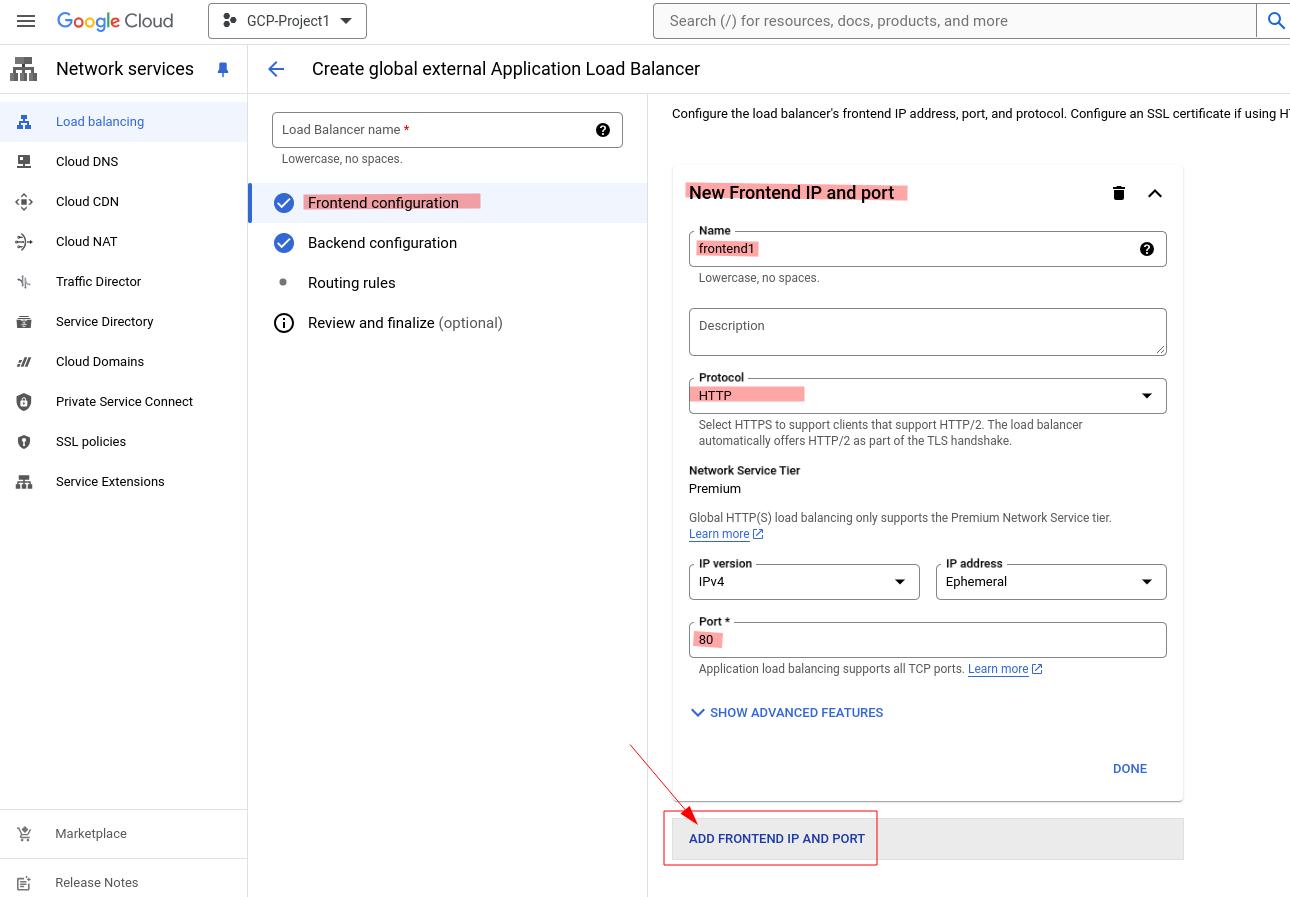
Frontend configuration Click Frontend configuration.
- Set Name to
frontend1 - Set Protocol to
HTTP. - Set Port to
80.
then click ADD FRONTEND IP AND PORT button to add another frontend to meet the requirements of HTTPS visiting website.
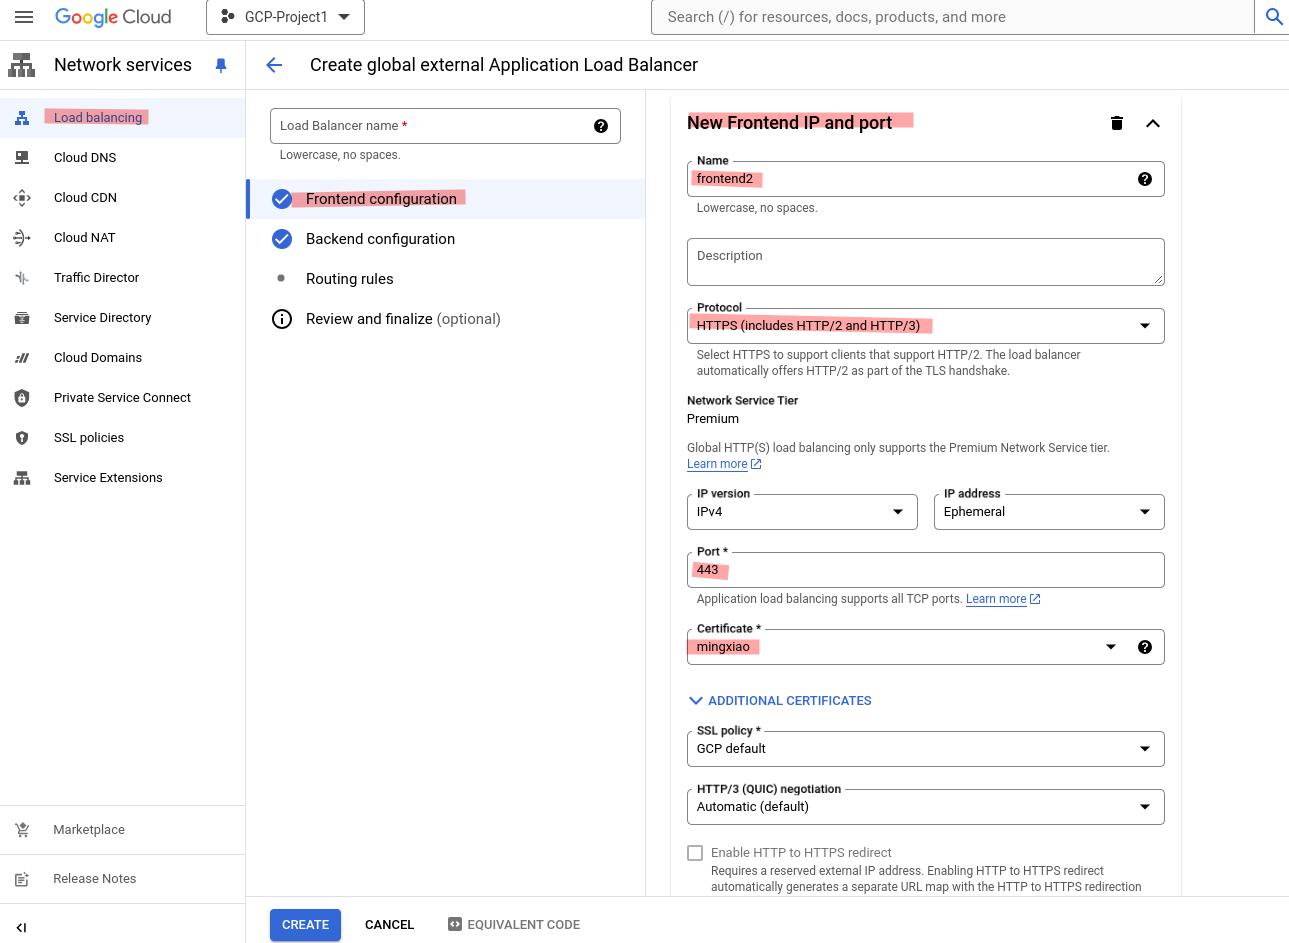
- Set Name to
frontend2 - Set Protocol to
HTTPS(includes HTTP/2 AND HTTP/3). - Set Port to
443.
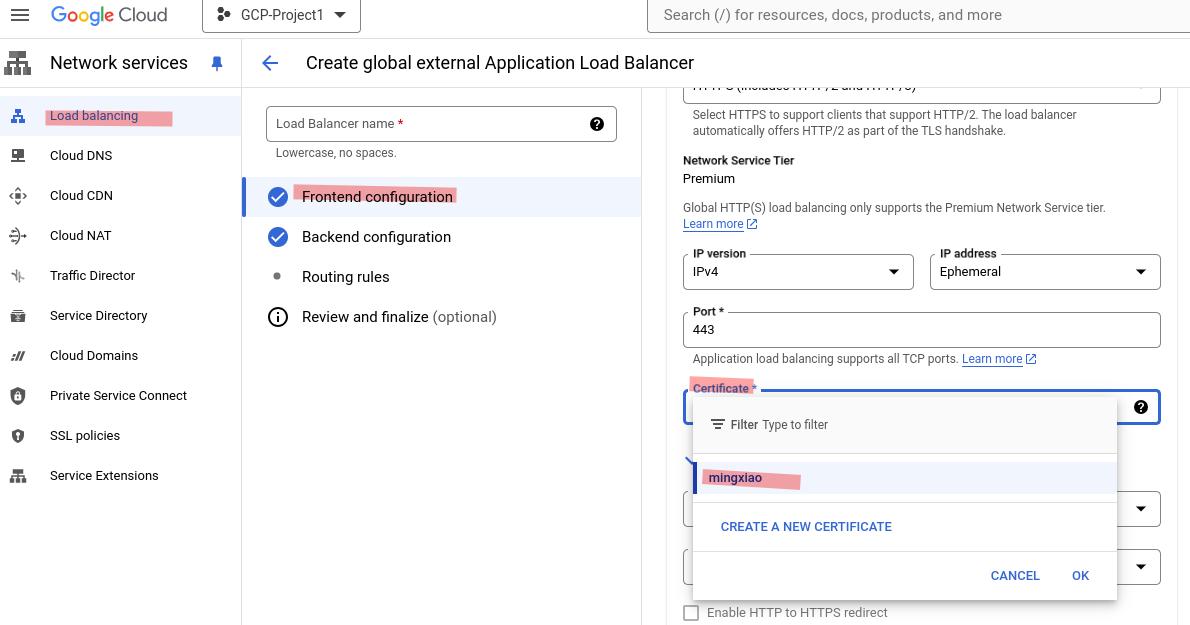
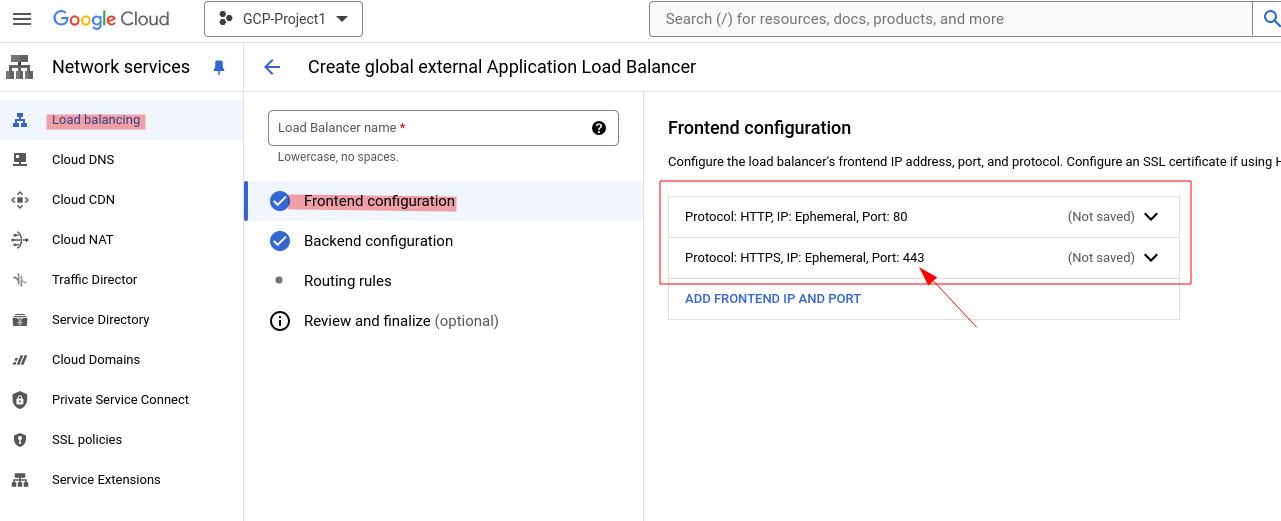
Set Certificate to mingxiao, Click Done then you will see this interface.
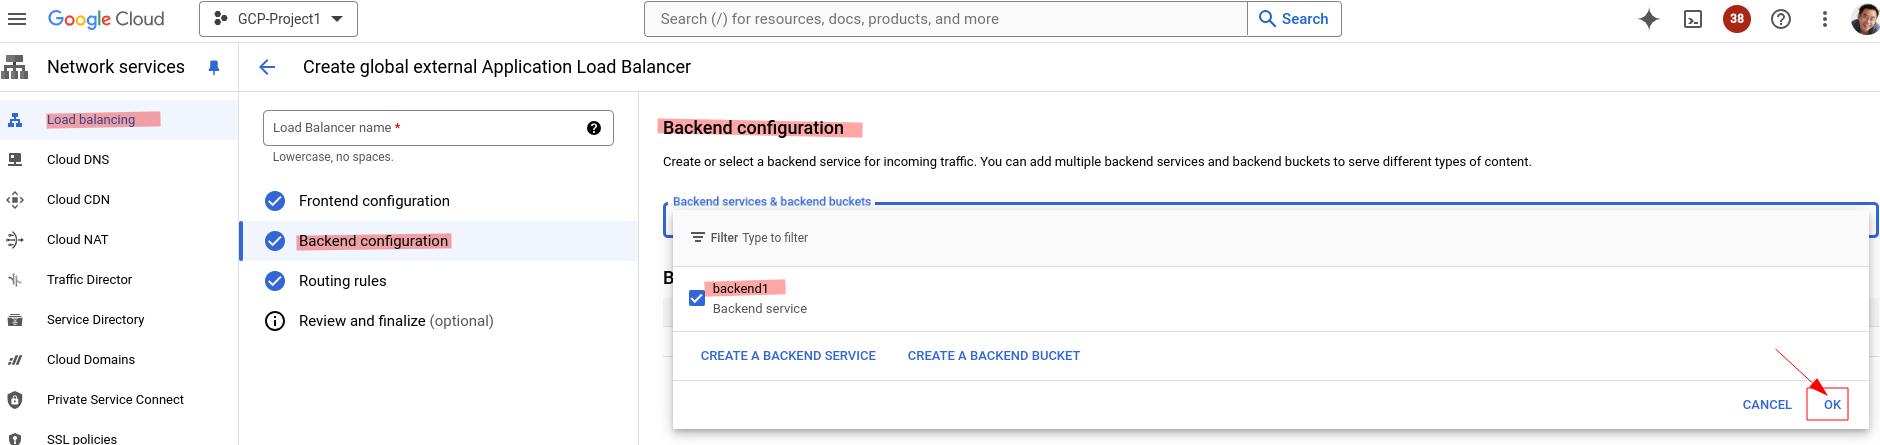
Backend configuration Click Backend configuration. Under Create or select backend services & backend buckets, select Backend services > Create a backend service.
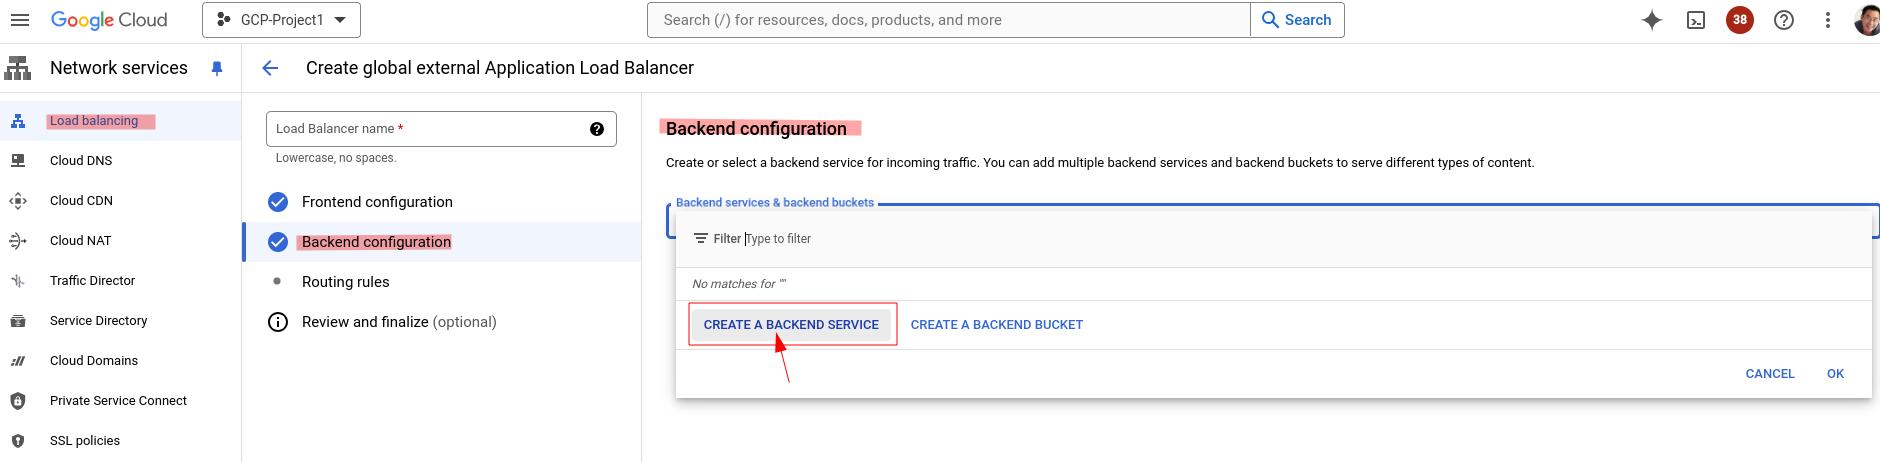
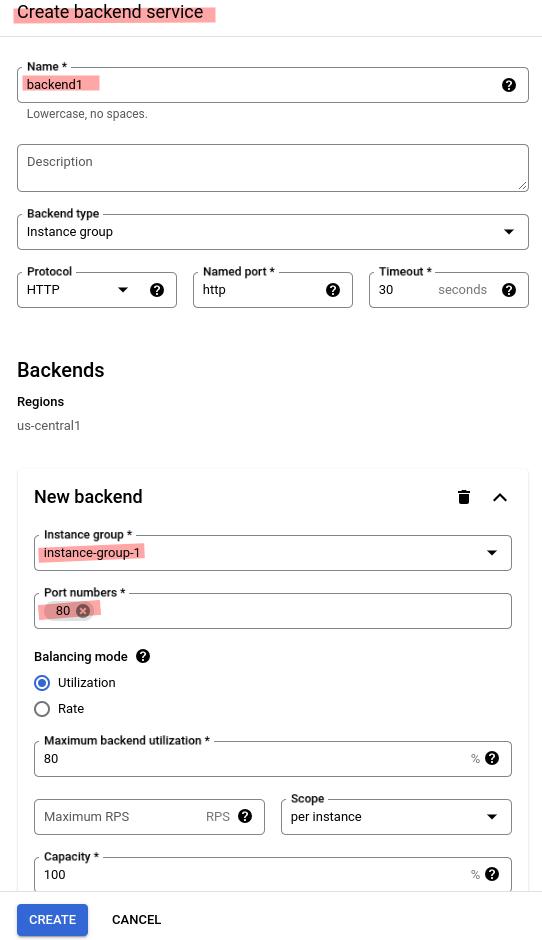
Add a name for your backend service, such as backend1.
- Under Protocol, select
HTTP. - For the Named Port, enter
http. - In Backends > New backend > Instance group, select your instance group,
instance-group-1. - For the Port numbers, enter
80.
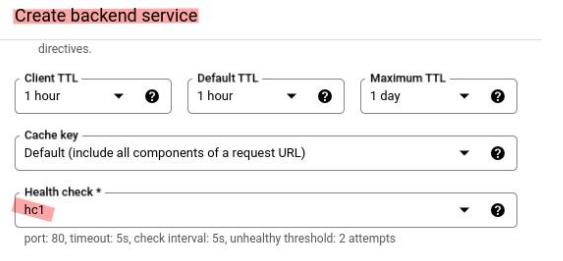
Under Health check, select hc1
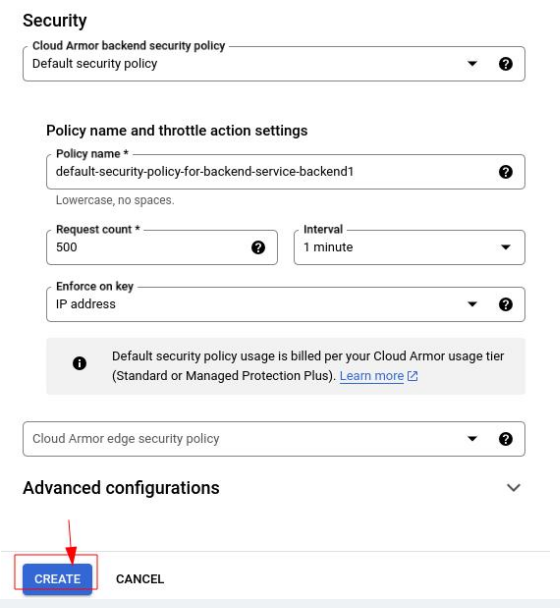
then click CREATE button to create backend service.
You will see this interface as below:
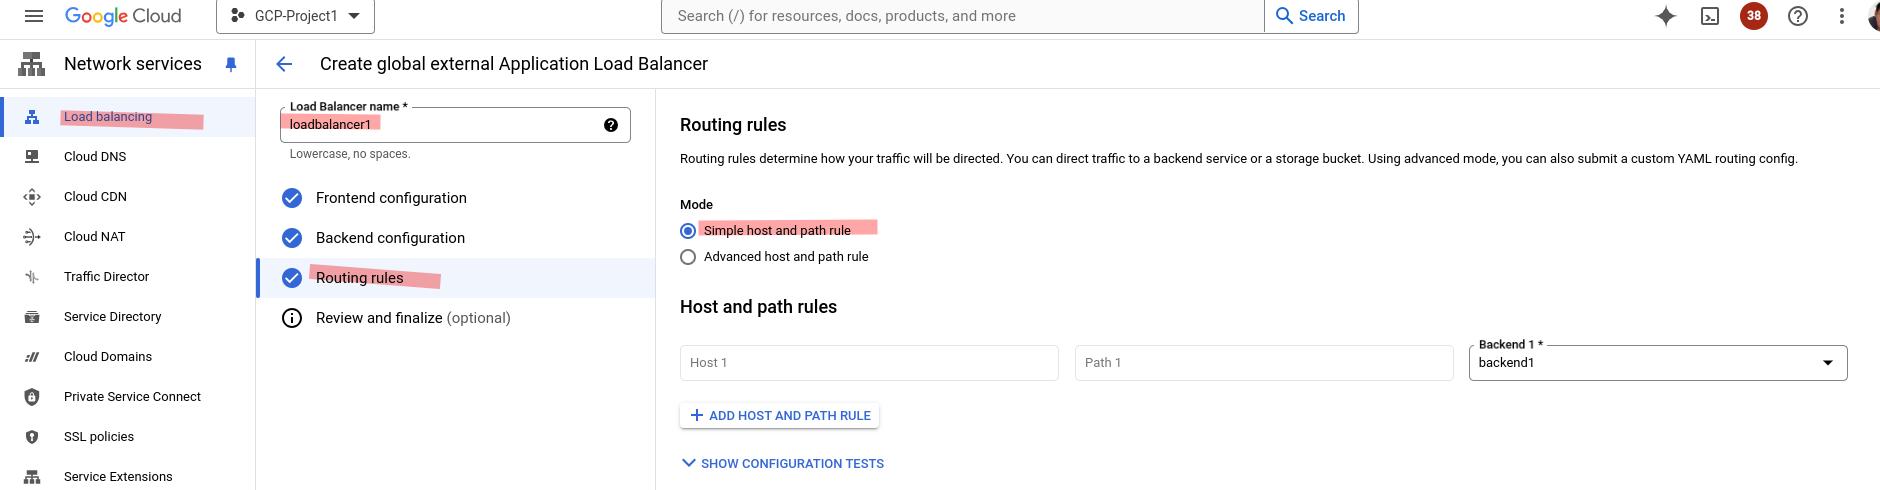
Routing rules
For Routing rules, retain the default settings.
Review and finalize
Click Review and finalize.
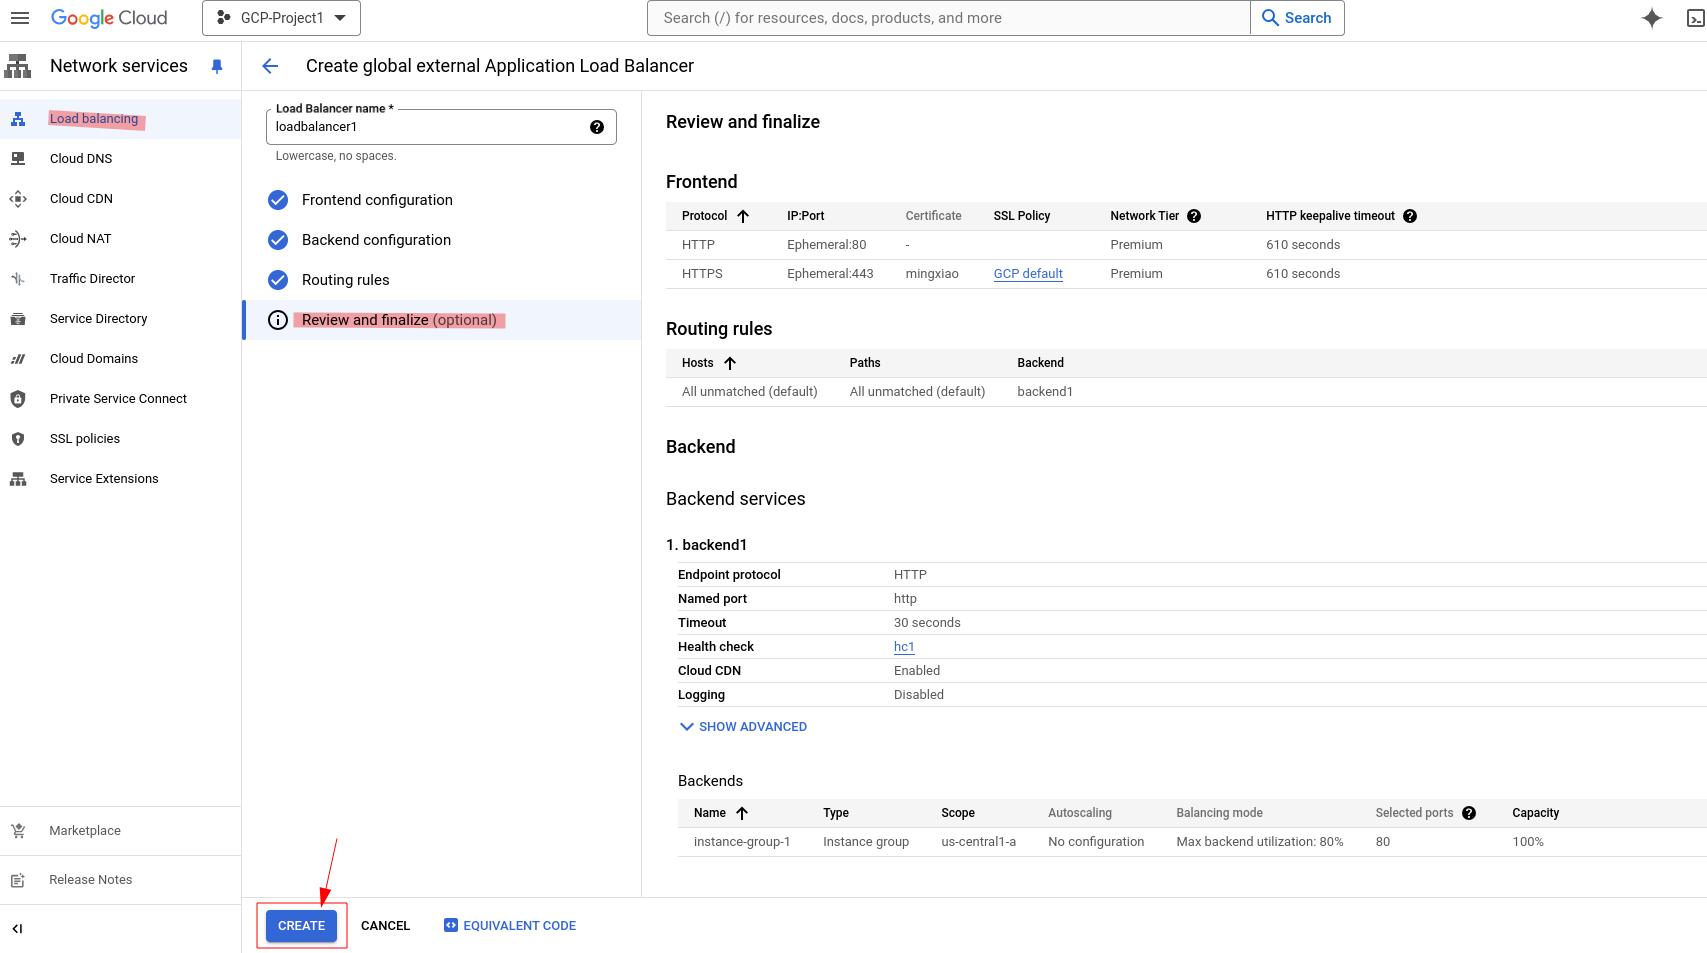
Review your load balancer configuration settings, Click Create.
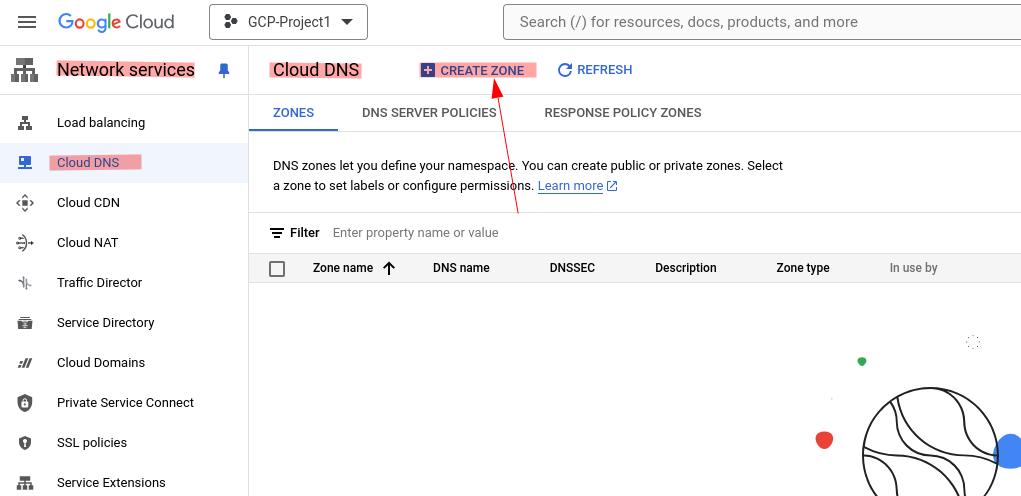
7. Configure Cloud DNS
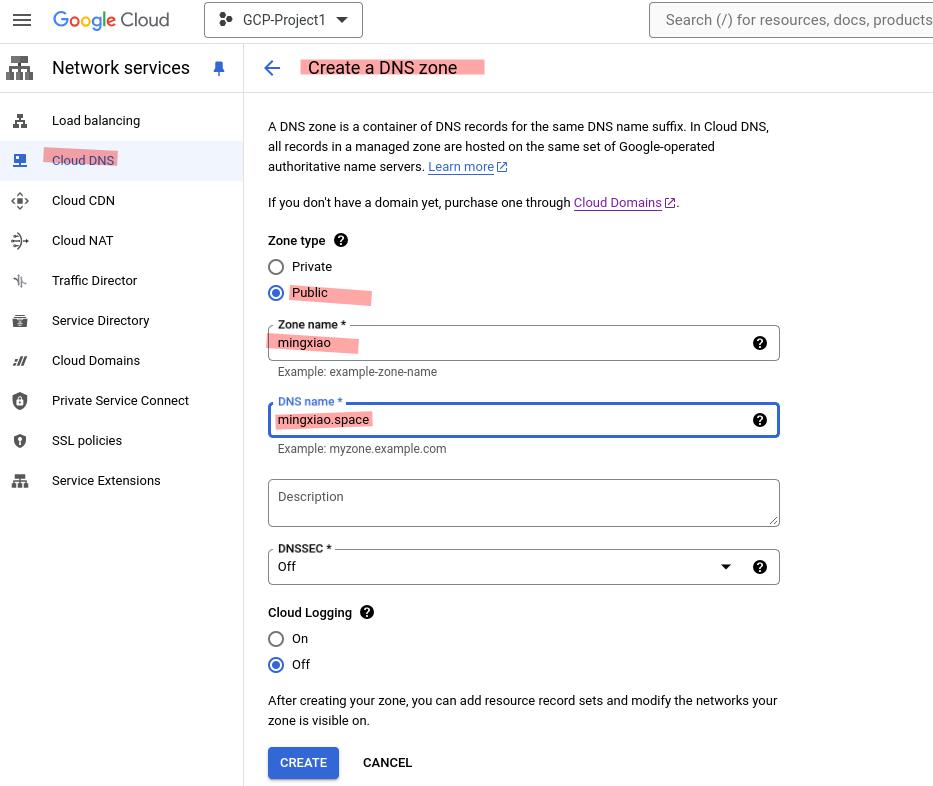
In the Google Cloud Console, go to the Create a DNS zone page.
- For the Zone type, select
Public. - For the Zone name, enter
mingxiao. - For the DNS name, enter
mingxiao.space, which is a domain name that I registered. - For DNSSEC, ensure that the
Offsetting is selected.
Click Create to create a zone populated with the NS and SOA records.
To point your registered domain name to the IP address of the hosting server, you must add an A record to your zone:
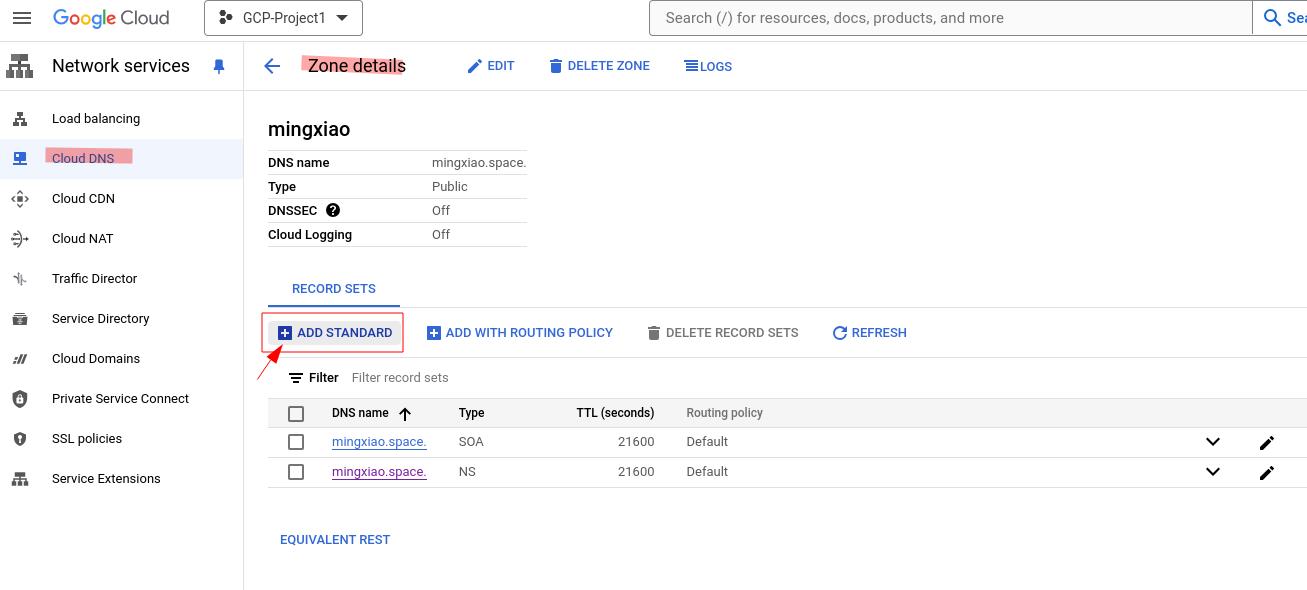
On the Zone details page, click Add Standard button.
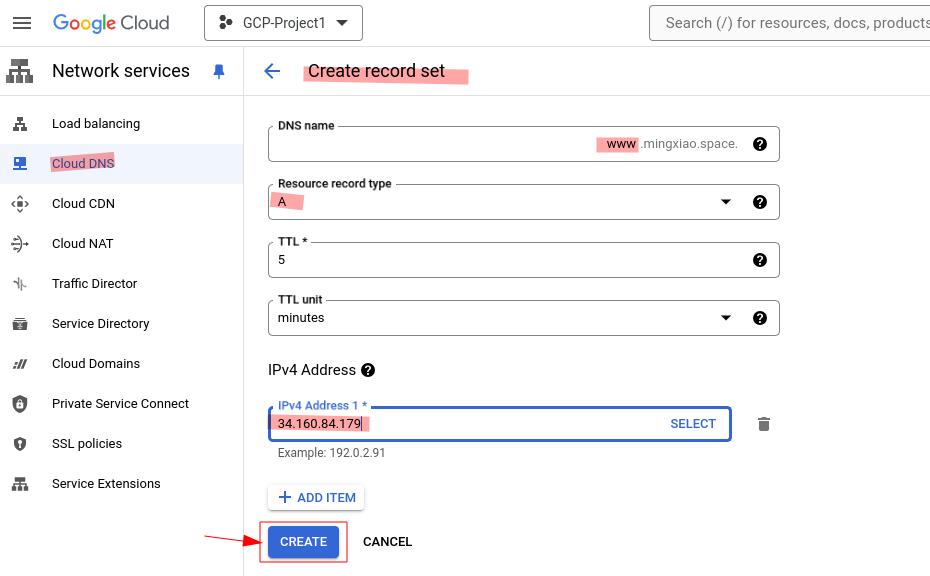
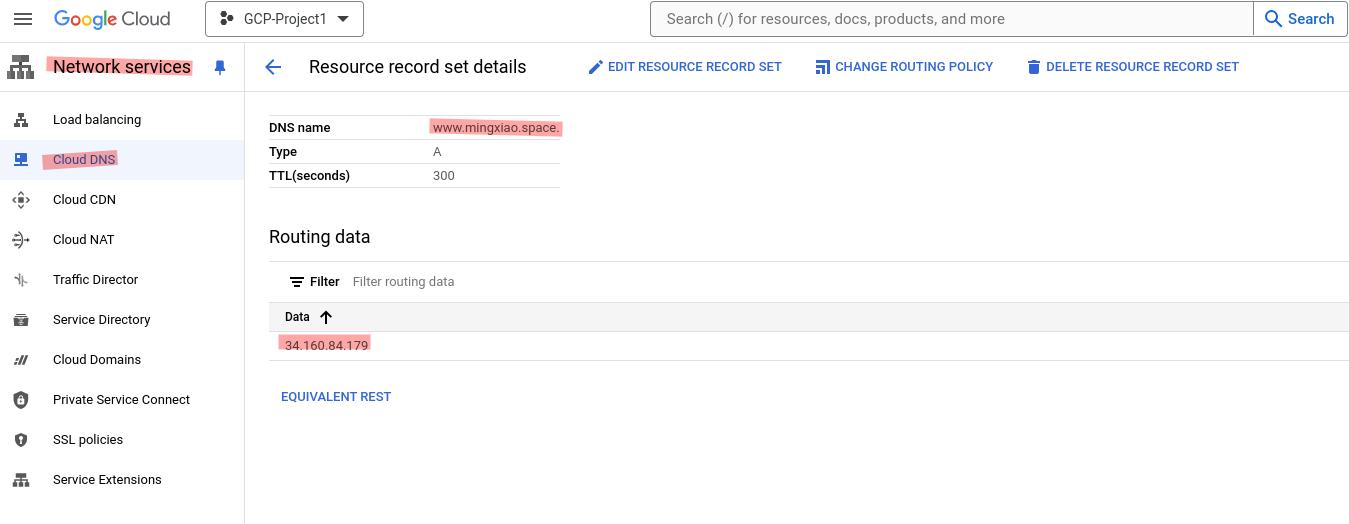
- In order to config
www.mingxiao.spaceA record, for the DNS name, enterwww - Select A from the Resource Record Type menu.
- For IPv4 Address, enter my instance IP address
34.160.84.179, we can check it from load balancer configuration.
Click Create to create the A record for your zone.
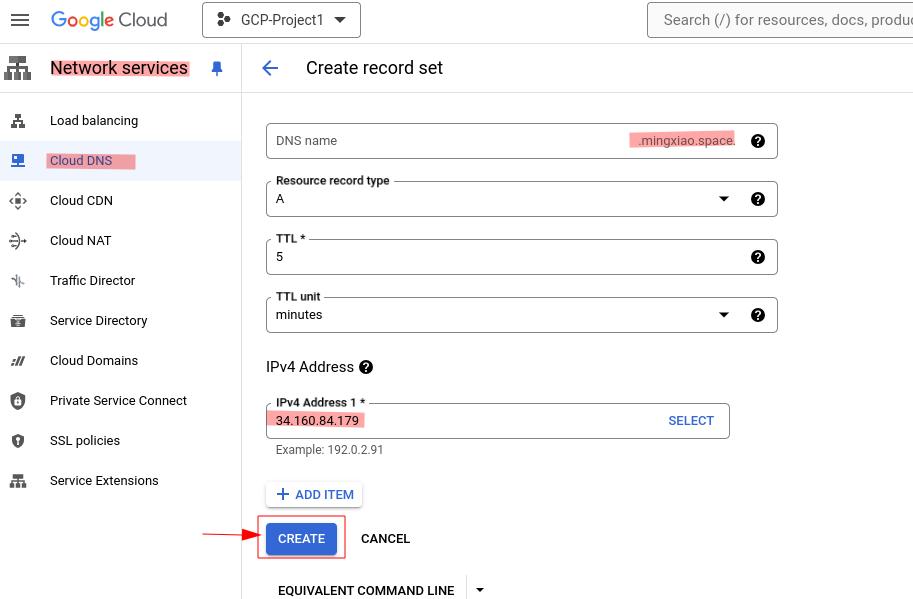
Again, On the Zone details page, click Add Standard button.
- In the DNS Name field, keep
mingxiao.space, don’t need to change. - For Resource Record Type, choose
Arecord. - For IPv4 Address, enter my instance IP address
34.160.84.179, we can check it from load balancer configuration.
Click Create to create the A record for your zone.
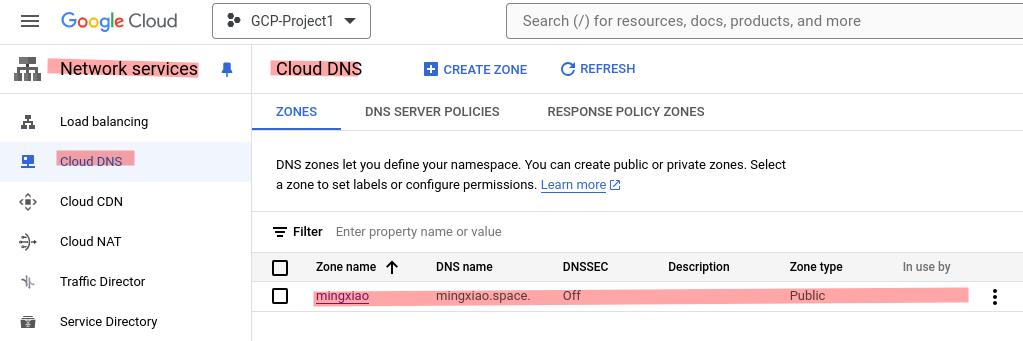
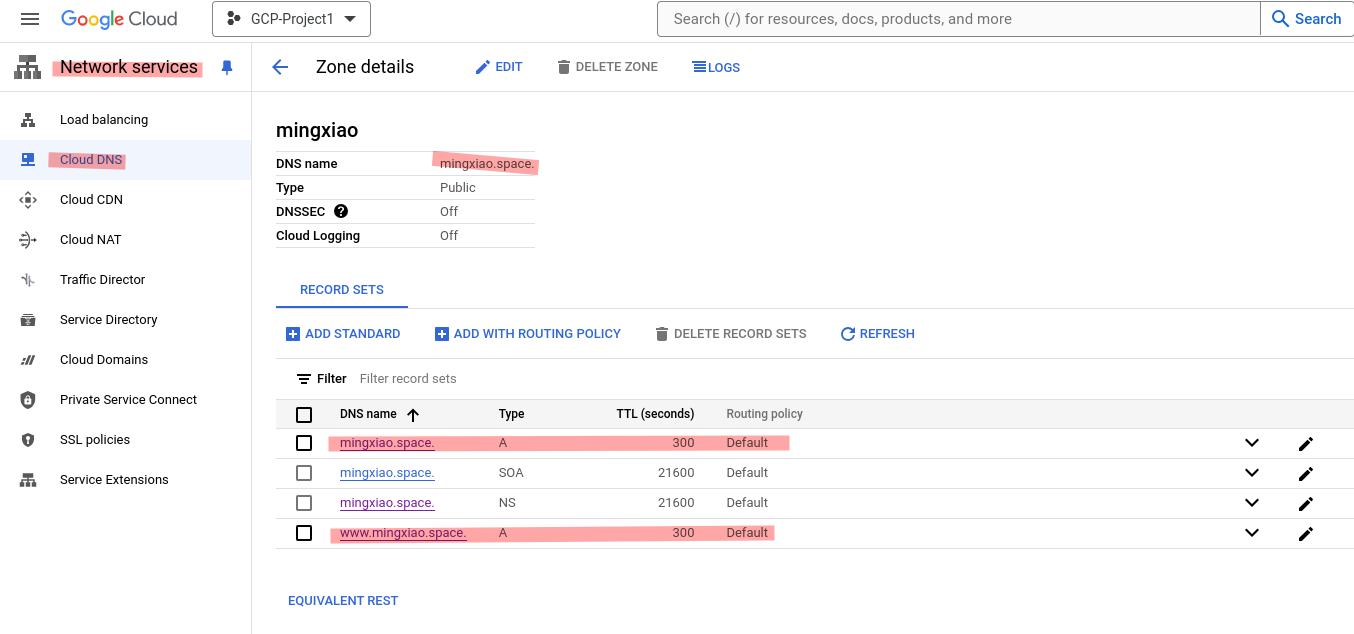
When you finished all the configuration, you can find a record in the Cloud DNS page.
When you click it, you can check the zone detail information.
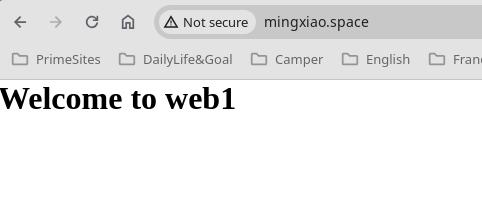
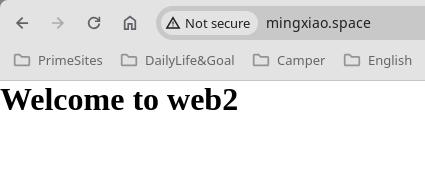
Now, we can make a test, open a web browser, type mingxiao.space and www.mingxiao.space
when you refresh the page, you can see the different content, that means the visiting traffic has been transferred to different VM instances to deal with user’s requests.